

In the world of enterprise cloud, managing Kubernetes clusters with services like GKE, EKS, or AKS is standard practice. These platforms offer incredible power but come with a learning curve and, more importantly, a cost that’s hard to justify for a homelab. As a platform engineer, I’m used to building and managing production-grade infrastructure, but as I explained in my first post, Why not a homelab?, I wanted a solution for my homelab that offered a similar centralized management experience without the overhead.
This is where Talos Linux comes in. Created by Sidero Labs, Talos is a modern OS designed specifically for Kubernetes. It’s minimal, secure, and immutable, which means it’s built from the ground up to be a rock-solid foundation for your clusters. But a powerful OS is only half the story. How do you manage the clusters running on it?
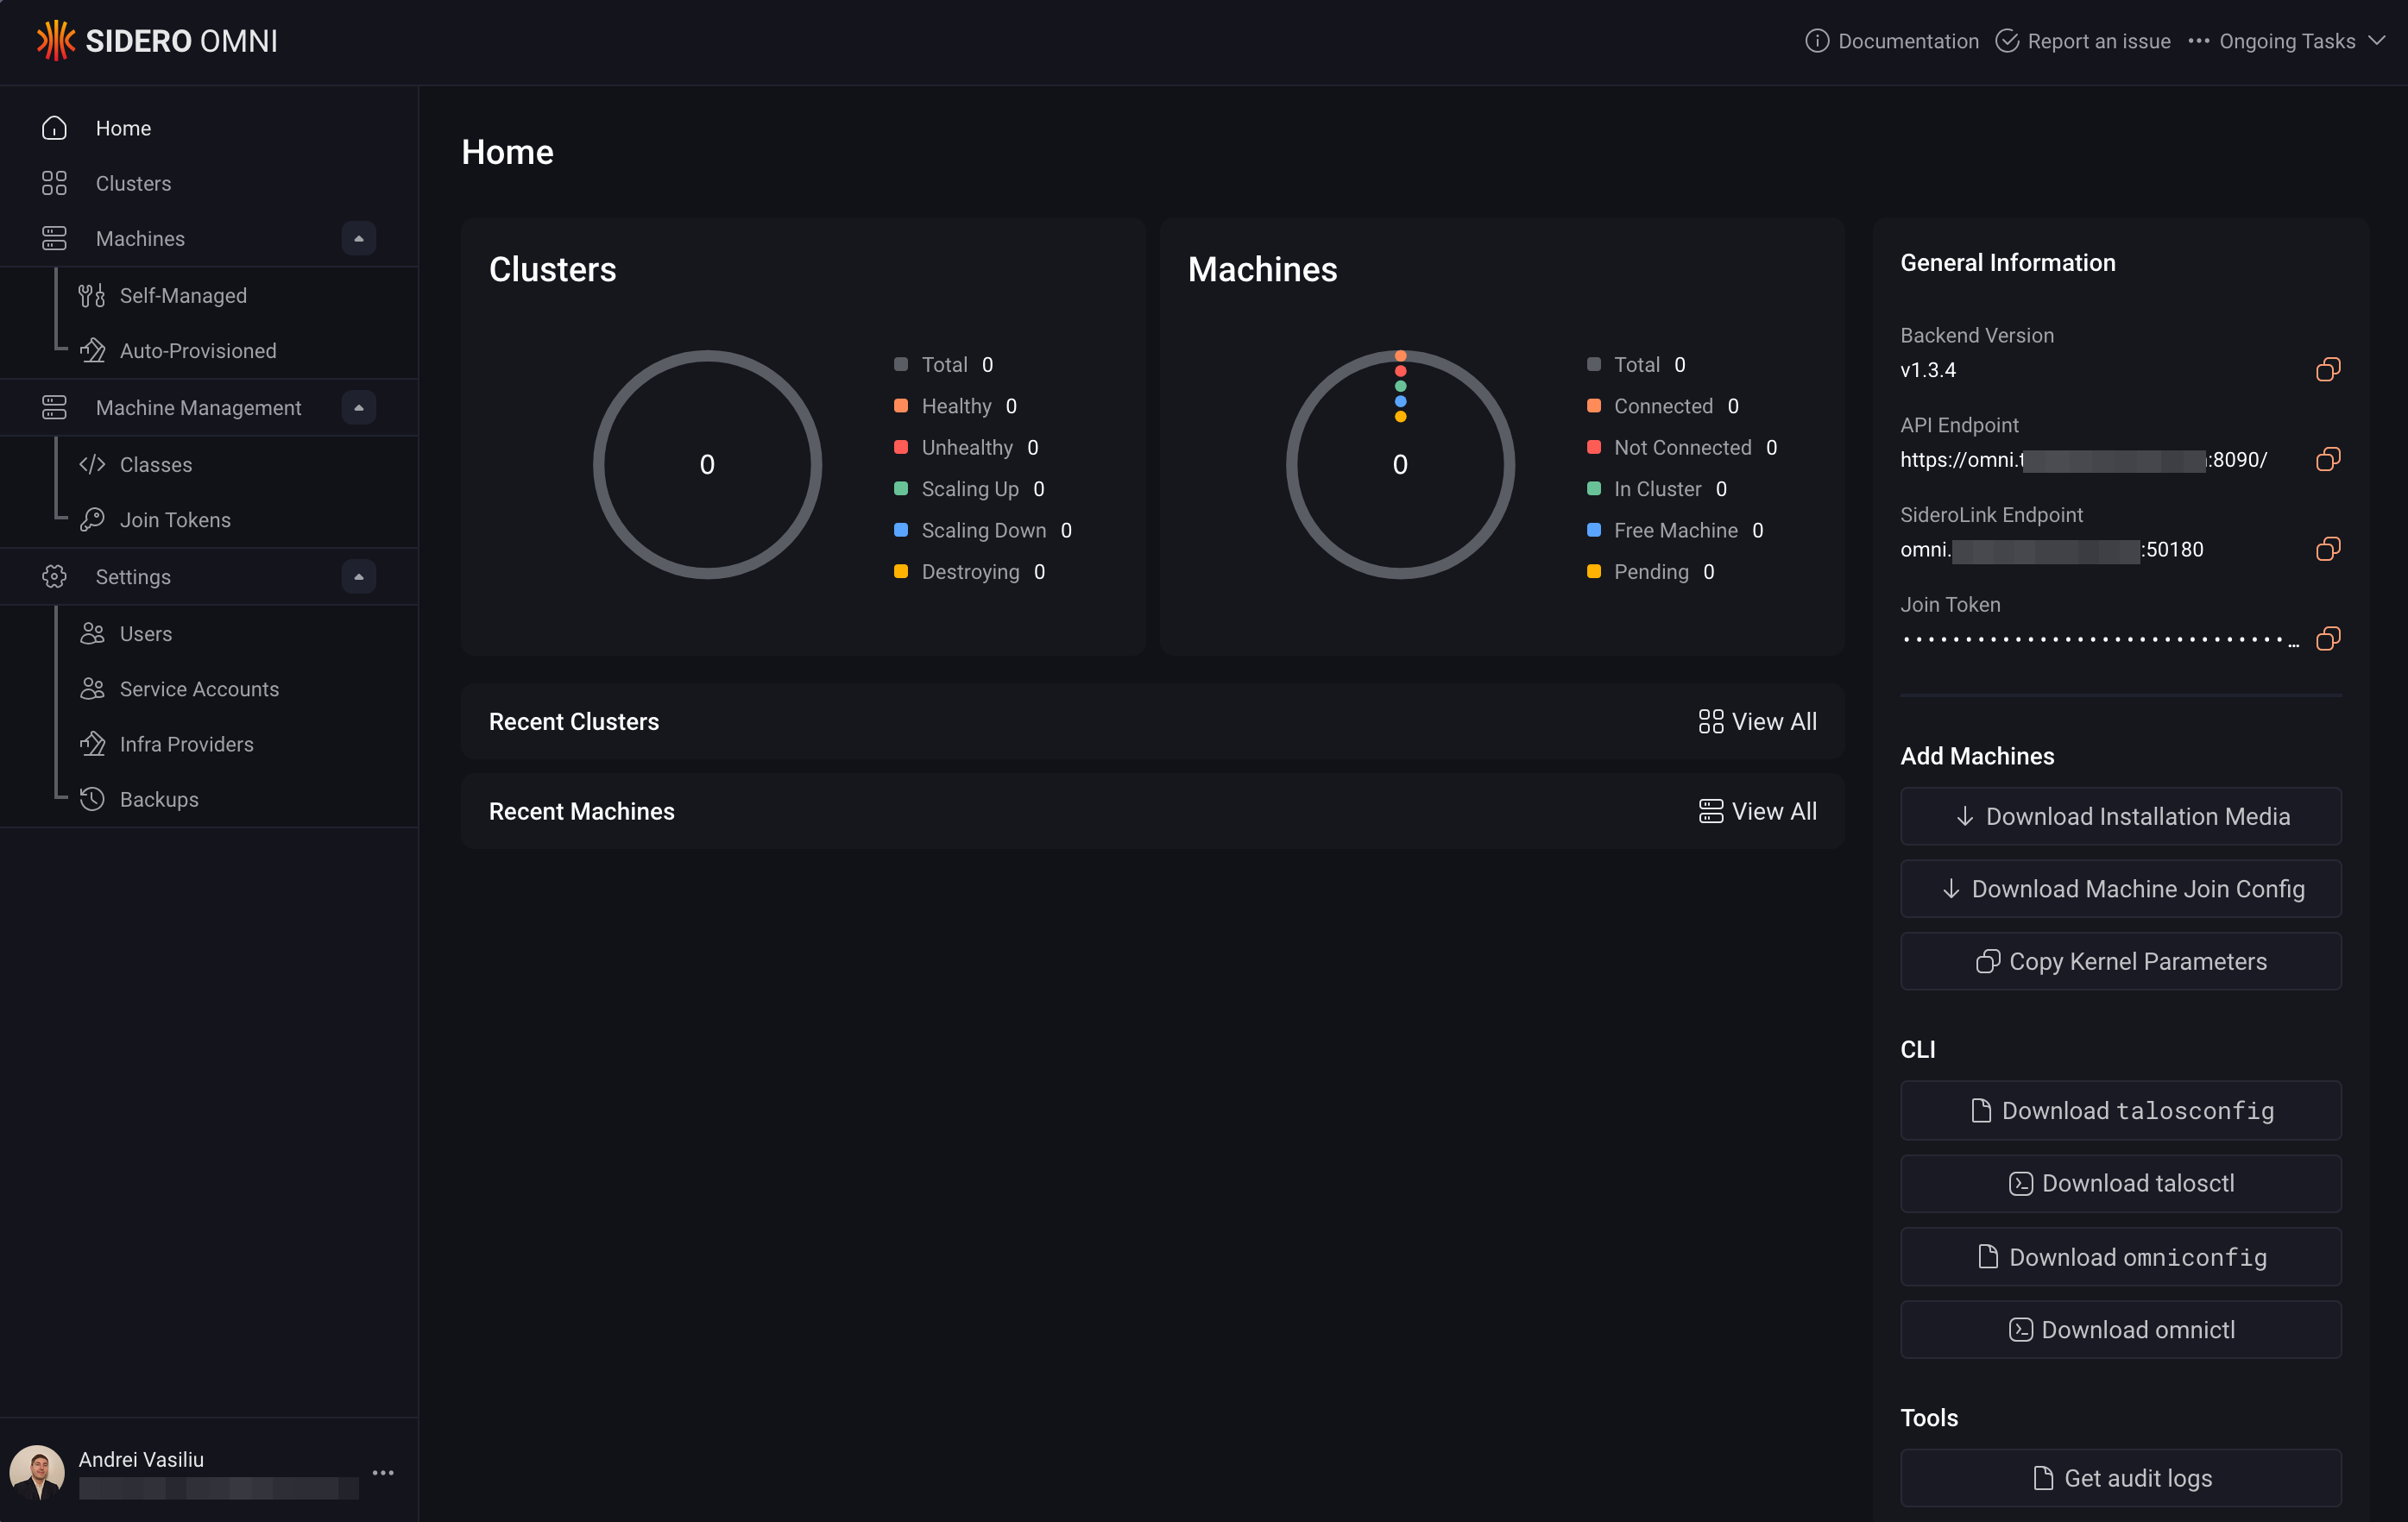
Enter Talos Omni, the purpose-built management plane for Talos Linux clusters. Omni provides a clean, centralized GUI for cluster lifecycle management, secure bootstrapping, and observability. It’s the bridge between manually juggling kubeconfig files and a full-blown managed Kubernetes service. By self-hosting Omni, you get the same powerful workflows you’d find in the cloud, but with full control over your own infrastructure.
This post is a hands-on guide to installing Talos Omni on-premises using Docker. We’ll walk through the process step-by-step, applying enterprise security principles like secure certificate management, etcd encryption, and centralized authentication to our homelab setup.
Why Not Just Use Managed Kubernetes?#
For production workloads, managed Kubernetes is often the right choice. It offloads the operational burden of the control plane, offers auto-scaling, and integrates deeply with cloud provider services. However, in a homelab, the goals are different: learning, experimentation, and cost control.
| Feature | Managed Kubernetes | Talos Omni (Self-Hosted) |
|---|---|---|
| Control Plane | Managed by the cloud provider. | Self-managed, running on your hardware. |
| Cost | Pay-per-hour for the control plane, plus worker nodes. | One-time hardware cost, minimal operational expense. |
| Complexity | Abstracted away, but provider-specific configurations can be complex. | You control the entire stack, offering deeper learning opportunities. |
| Customization | Limited to what the provider exposes. | Fully customizable to your needs. |
For a homelab, Talos Omni hits the sweet spot. It provides a clean, web-based UI to manage multiple clusters, making it feel like a private, mini-managed Kubernetes service. It’s the perfect tool for applying platform engineering principles at home.
Prerequisites#
Before we begin, ensure you have the following:
- A Docker host (I’m using an Ubuntu VM with a static IP, which I set up as part of my segmented homelab network).
- A registered domain name managed via Cloudflare.
- A Cloudflare account for DNS management.
- An Auth0 account for setting up single sign-on (SSO).
Step 1: Generate TLS Certificates with Certbot#
Just like in a production environment, we’ll start by securing our endpoint with TLS. We’ll use Certbot and the Cloudflare DNS plugin to generate a wildcard certificate.
Install Certbot and the Cloudflare DNS plugin:
sudo snap install --classic certbot
sudo snap set certbot trust-plugin-with-root=ok
sudo snap install certbot-dns-cloudflare
Create a Cloudflare API Token: Log in to your Cloudflare dashboard, go to API Tokens, and create a token with
Zone:DNS:Editpermissions for your domain.Generate the Certificate: Create a credentials file with your API token and then run Certbot.
# Create a credentials file
echo 'dns_cloudflare_api_token = <YOUR_CLOUDFLARE_API_TOKEN>' > cloudflare.ini
chmod 600 cloudflare.ini

# Request the certificate
sudo certbot certonly --dns-cloudflare --dns-cloudflare-credentials ./cloudflare.ini -d omni.yourdomain.com
Certbot will handle the DNS challenge and store the certificates in
/etc/letsencrypt/live/omni.yourdomain.com/.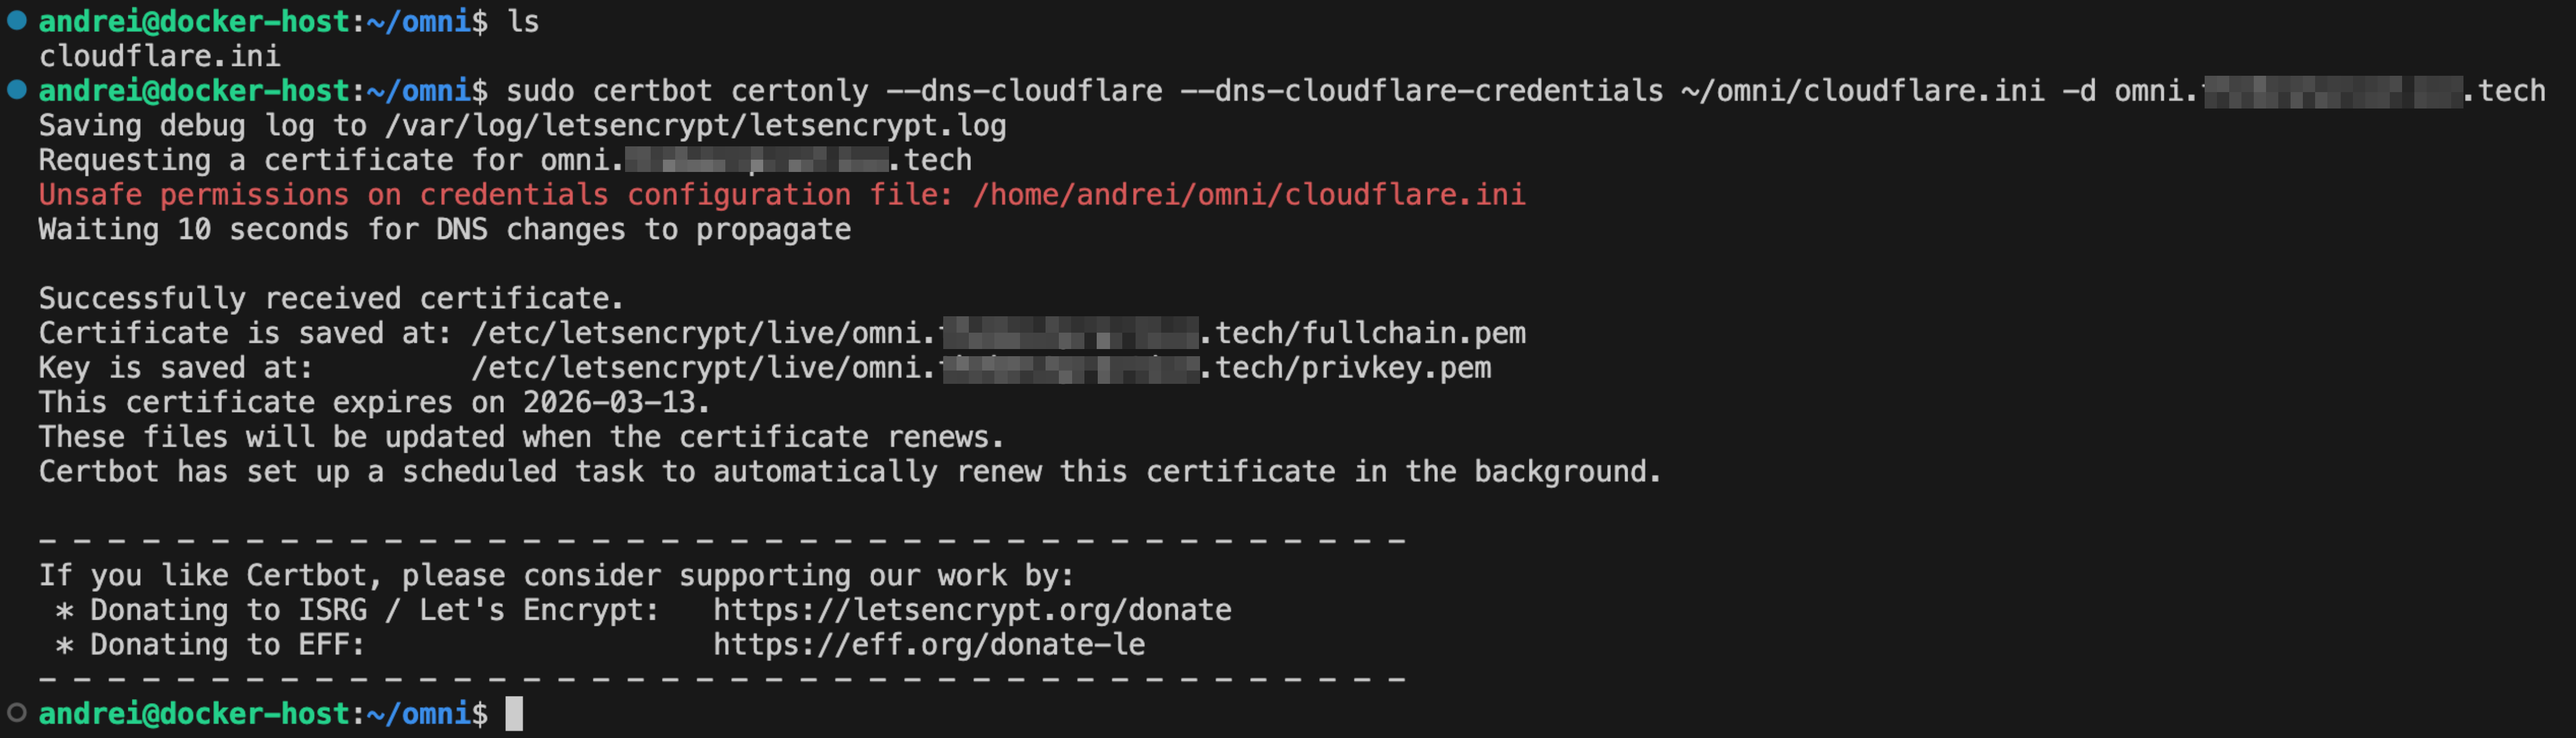
Step 2: Create an etcd Encryption Key with GPG#
Encrypting sensitive data at rest is a cornerstone of enterprise security. Omni stores its state in etcd, and we’ll use a GPG key to encrypt it. It is critical that you do not use a passphrase for this key, as it would break the automated bootstrap process.
Generate the GPG key:
# Generate the primary key
gpg --quick-generate-key "Omni (etcd encryption)" rsa4096 cert never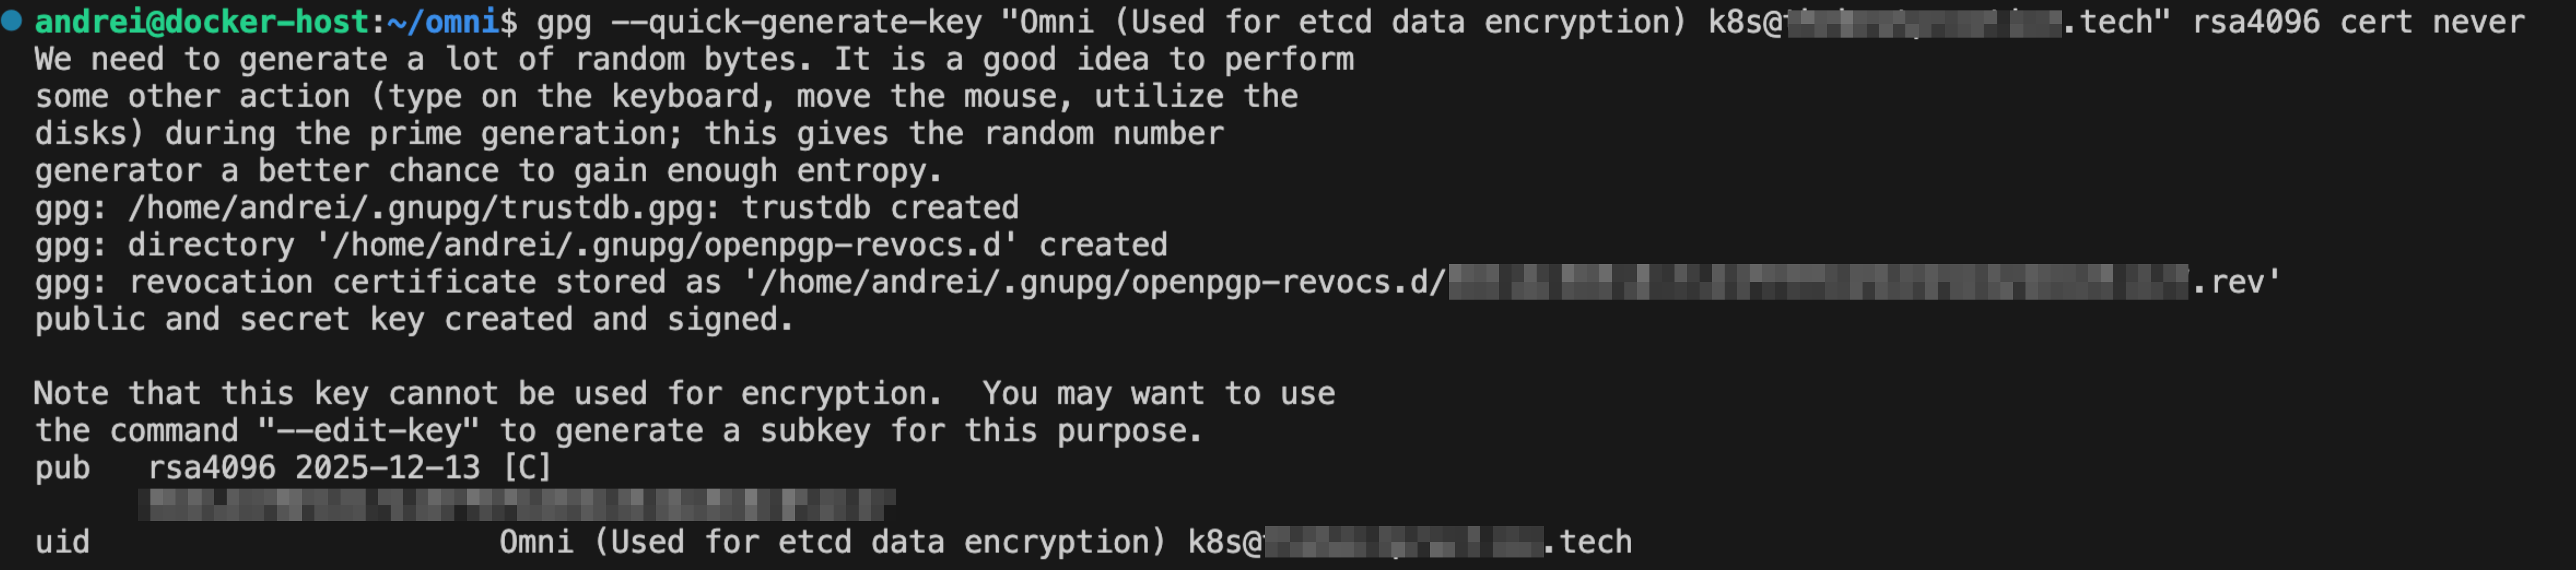
Add encription subkey:
# Add an encryption subkey (replace <YOUR_KEY_ID> with the ID from the previous command)
gpg --quick-add-key <YOUR_KEY_ID> rsa4096 encr never
Export the secret key:
gpg --export-secret-keys --armor <YOUR_KEY_ID> > omni.ascThis
omni.ascfile contains the key we’ll provide to Omni for etcd encryption.
Step 3: Configure Auth0 for SSO#
Instead of managing local users, we’ll integrate a proper identity provider, just as we would in a corporate environment.
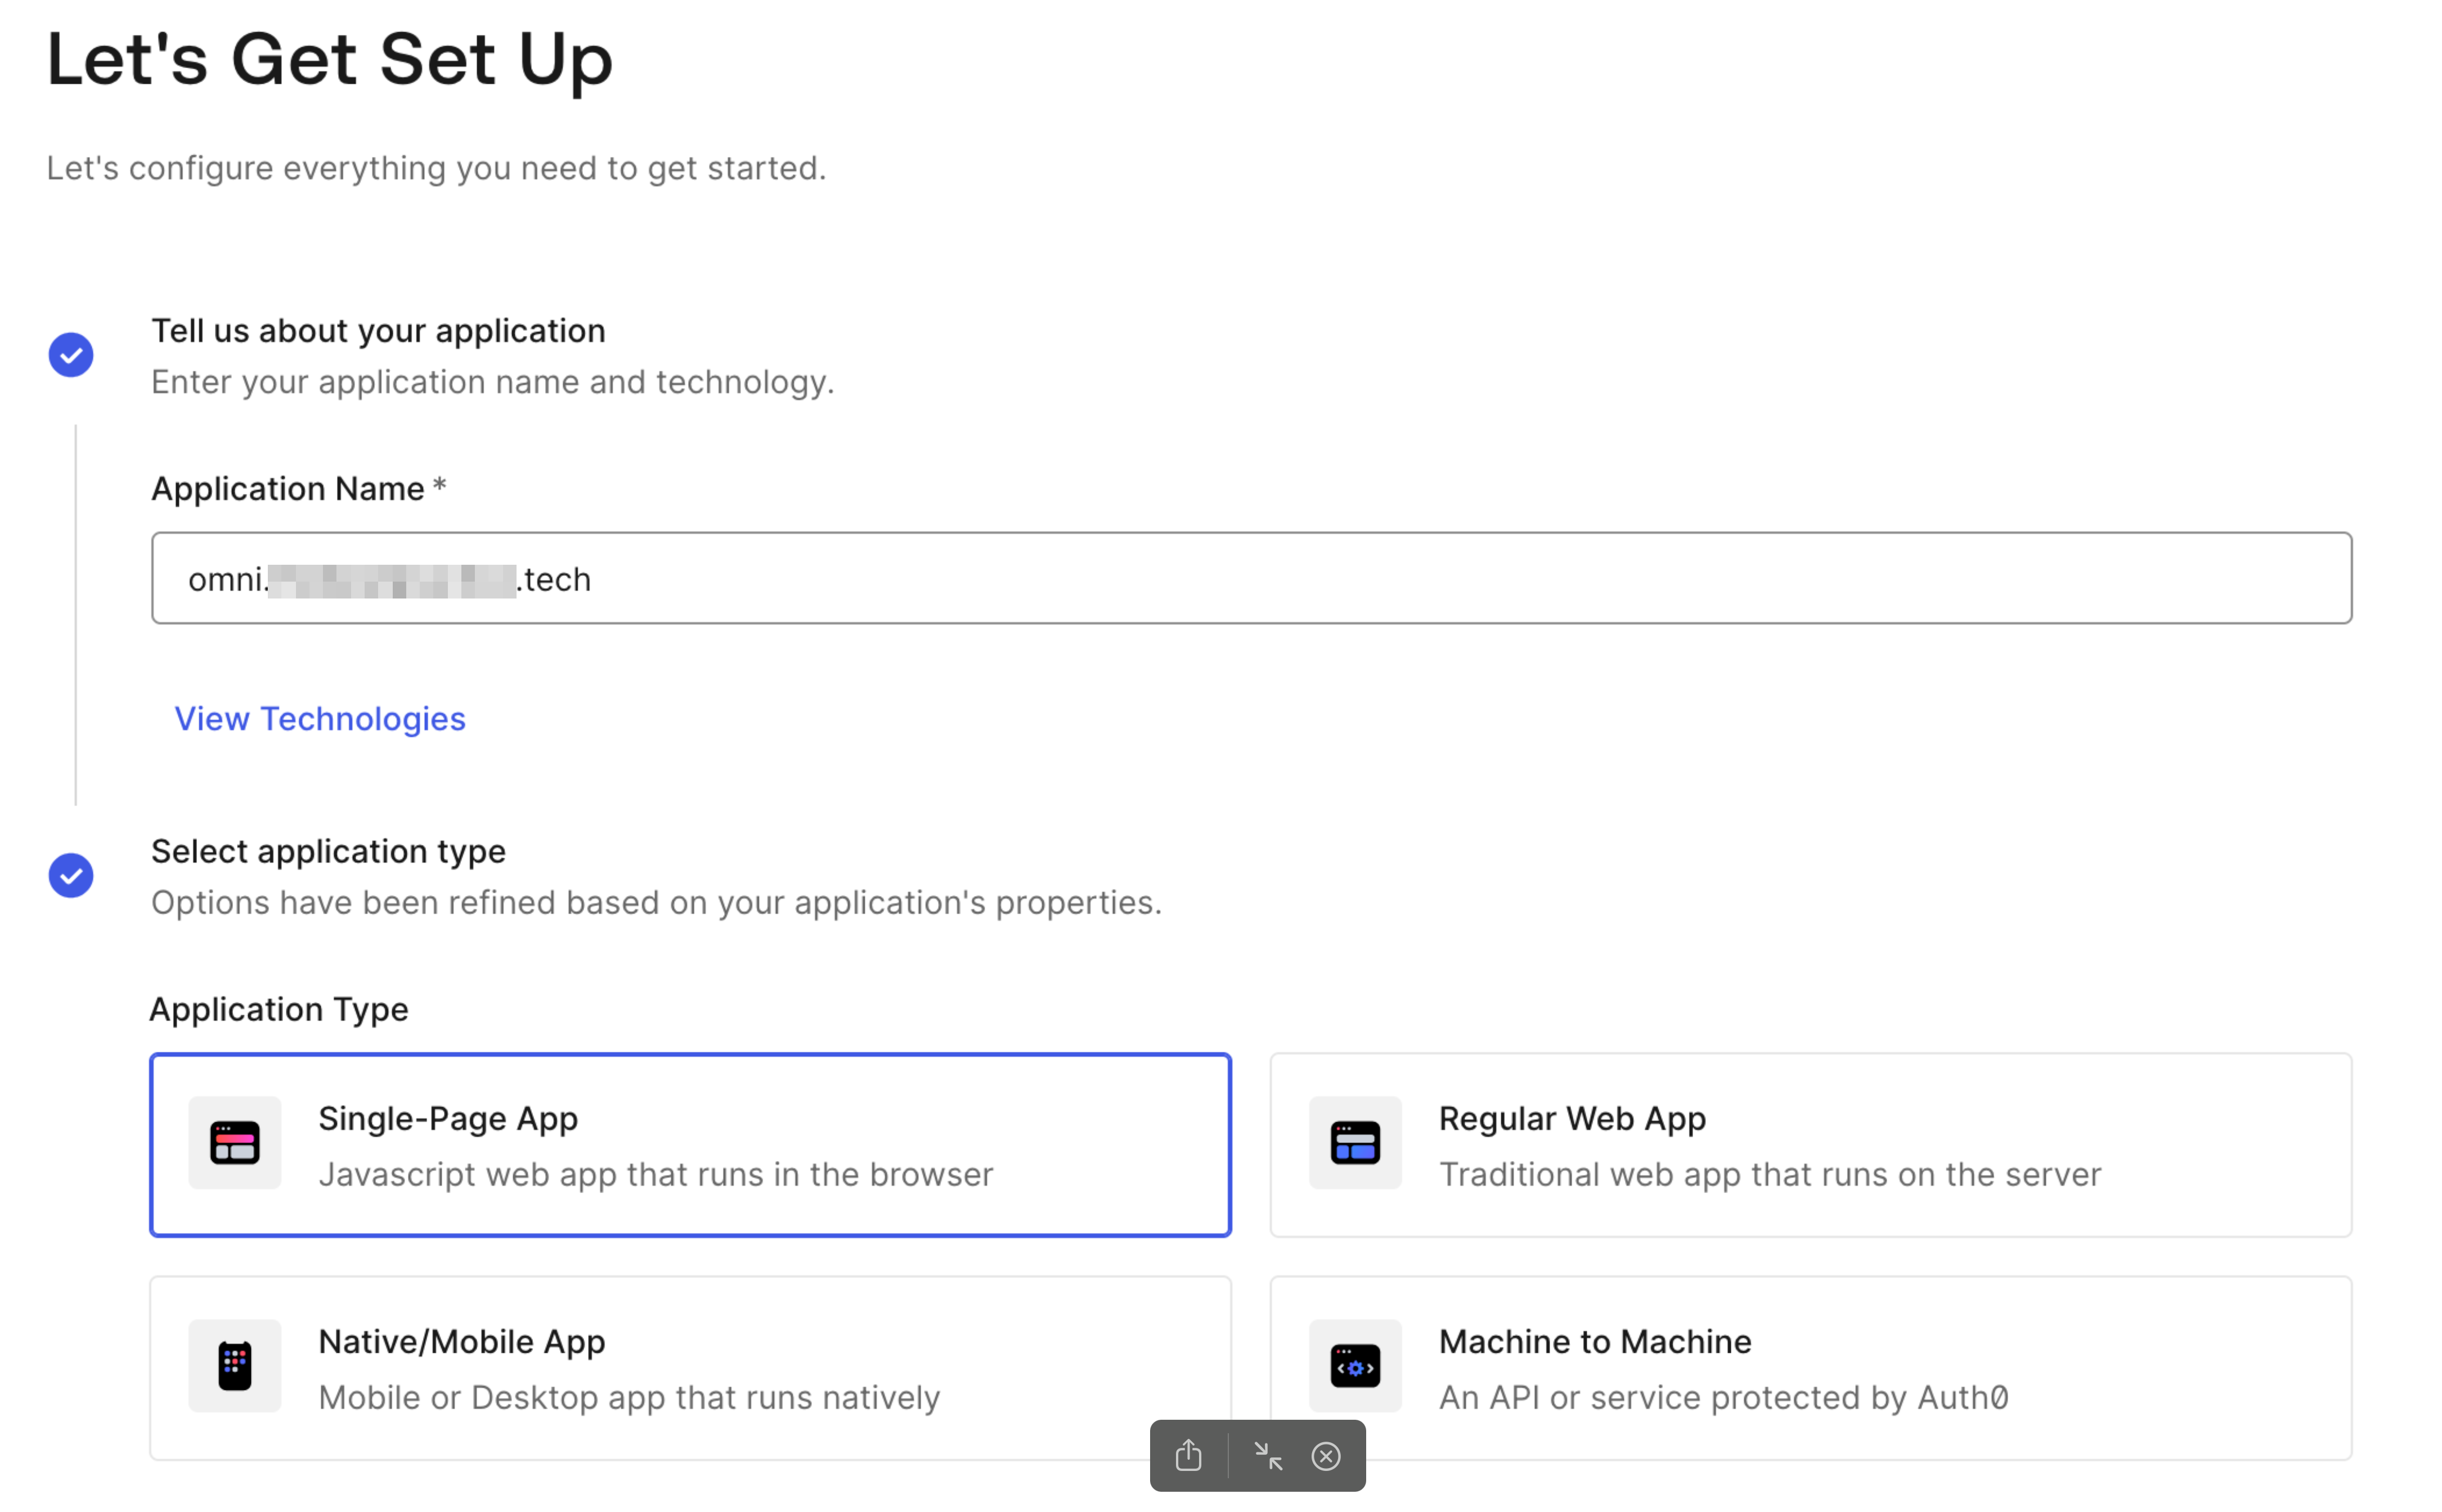
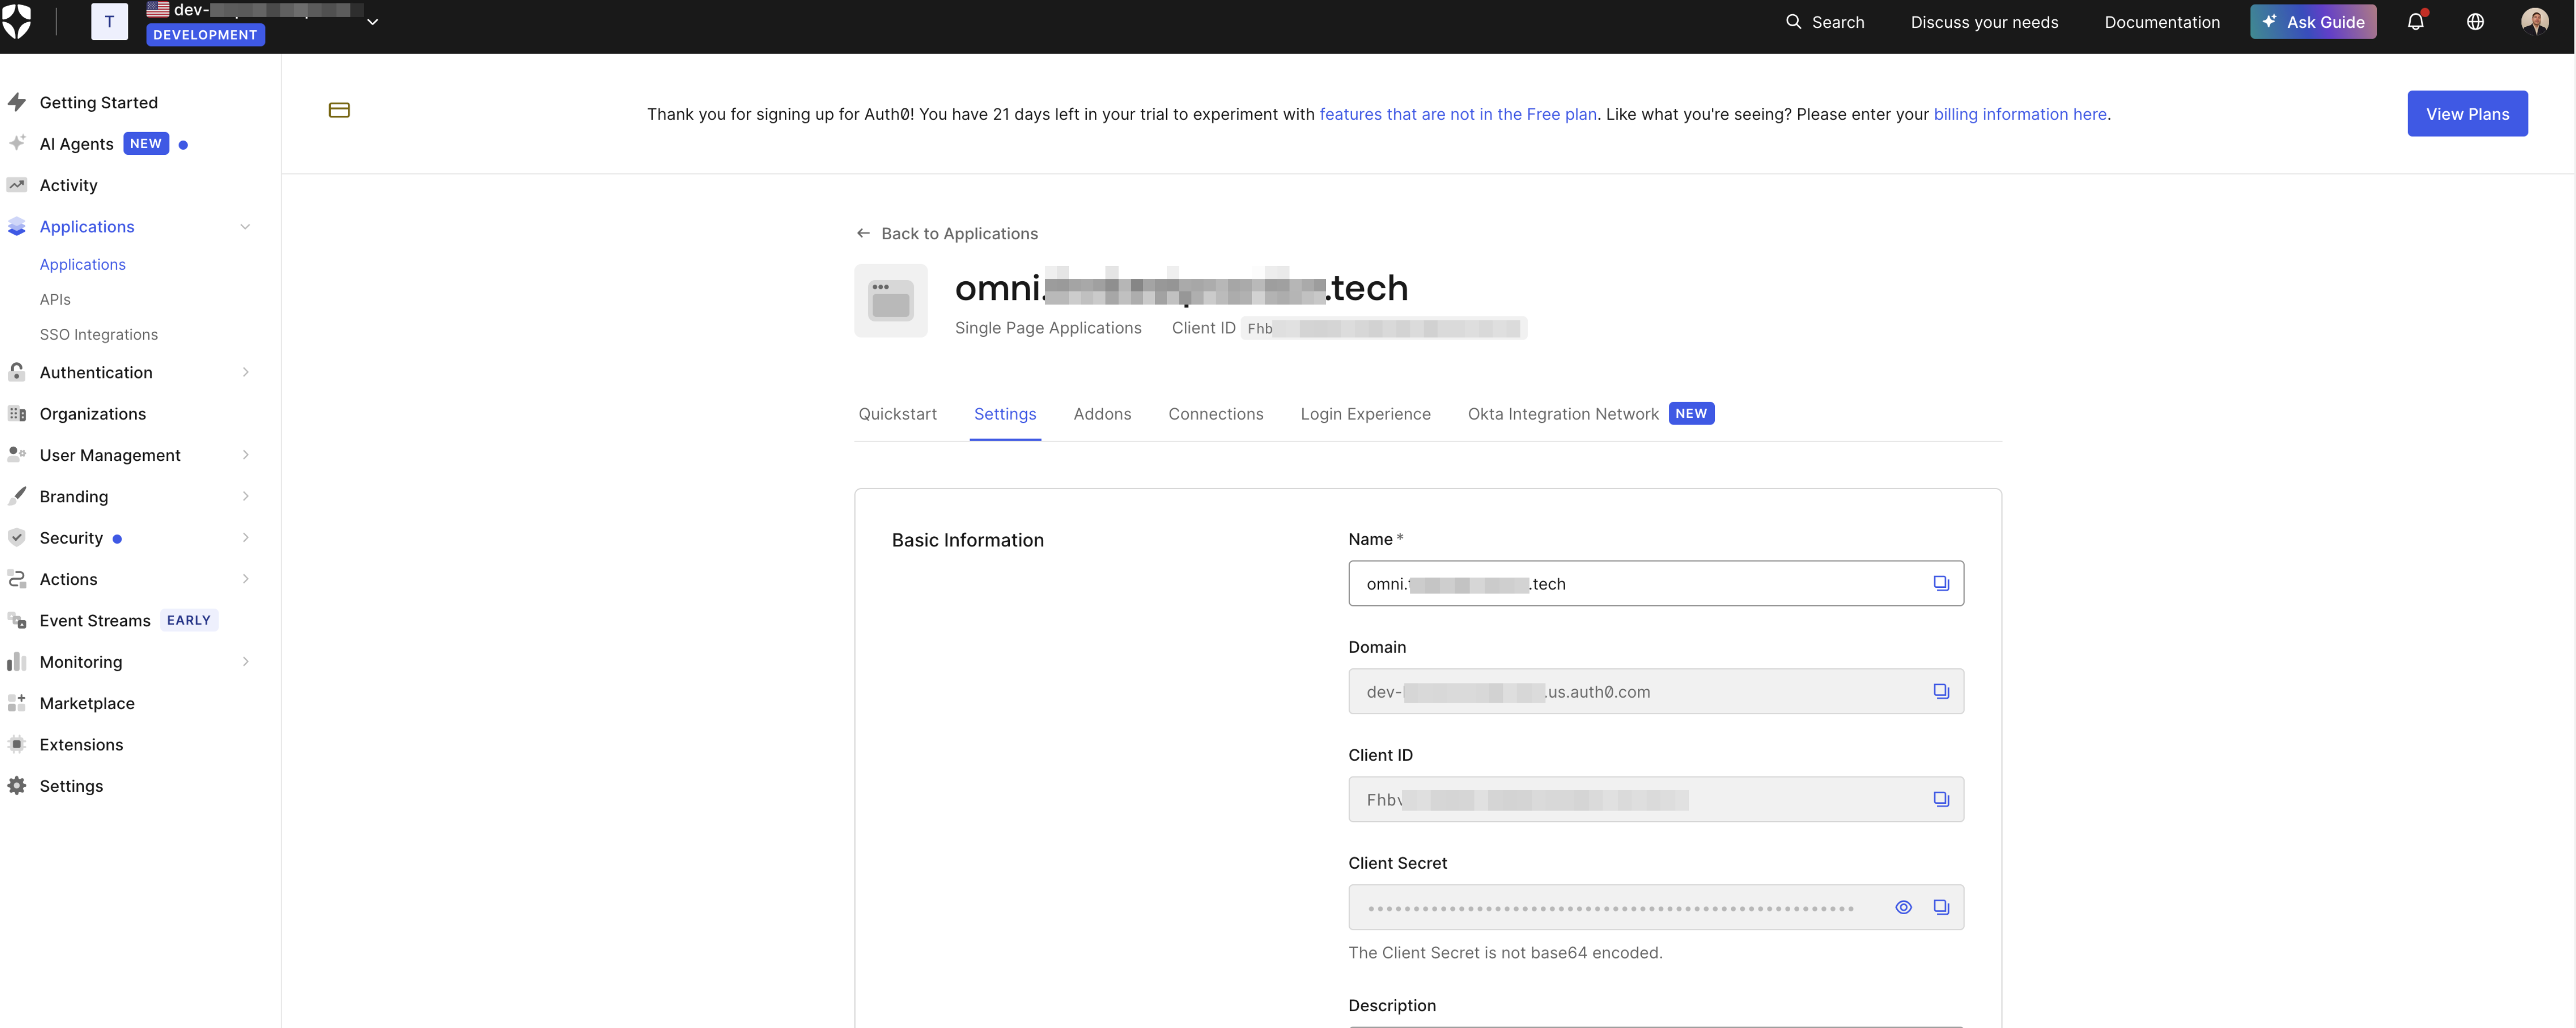
In your Auth0 dashboard, navigate to Applications and create a new Single-Page Application.
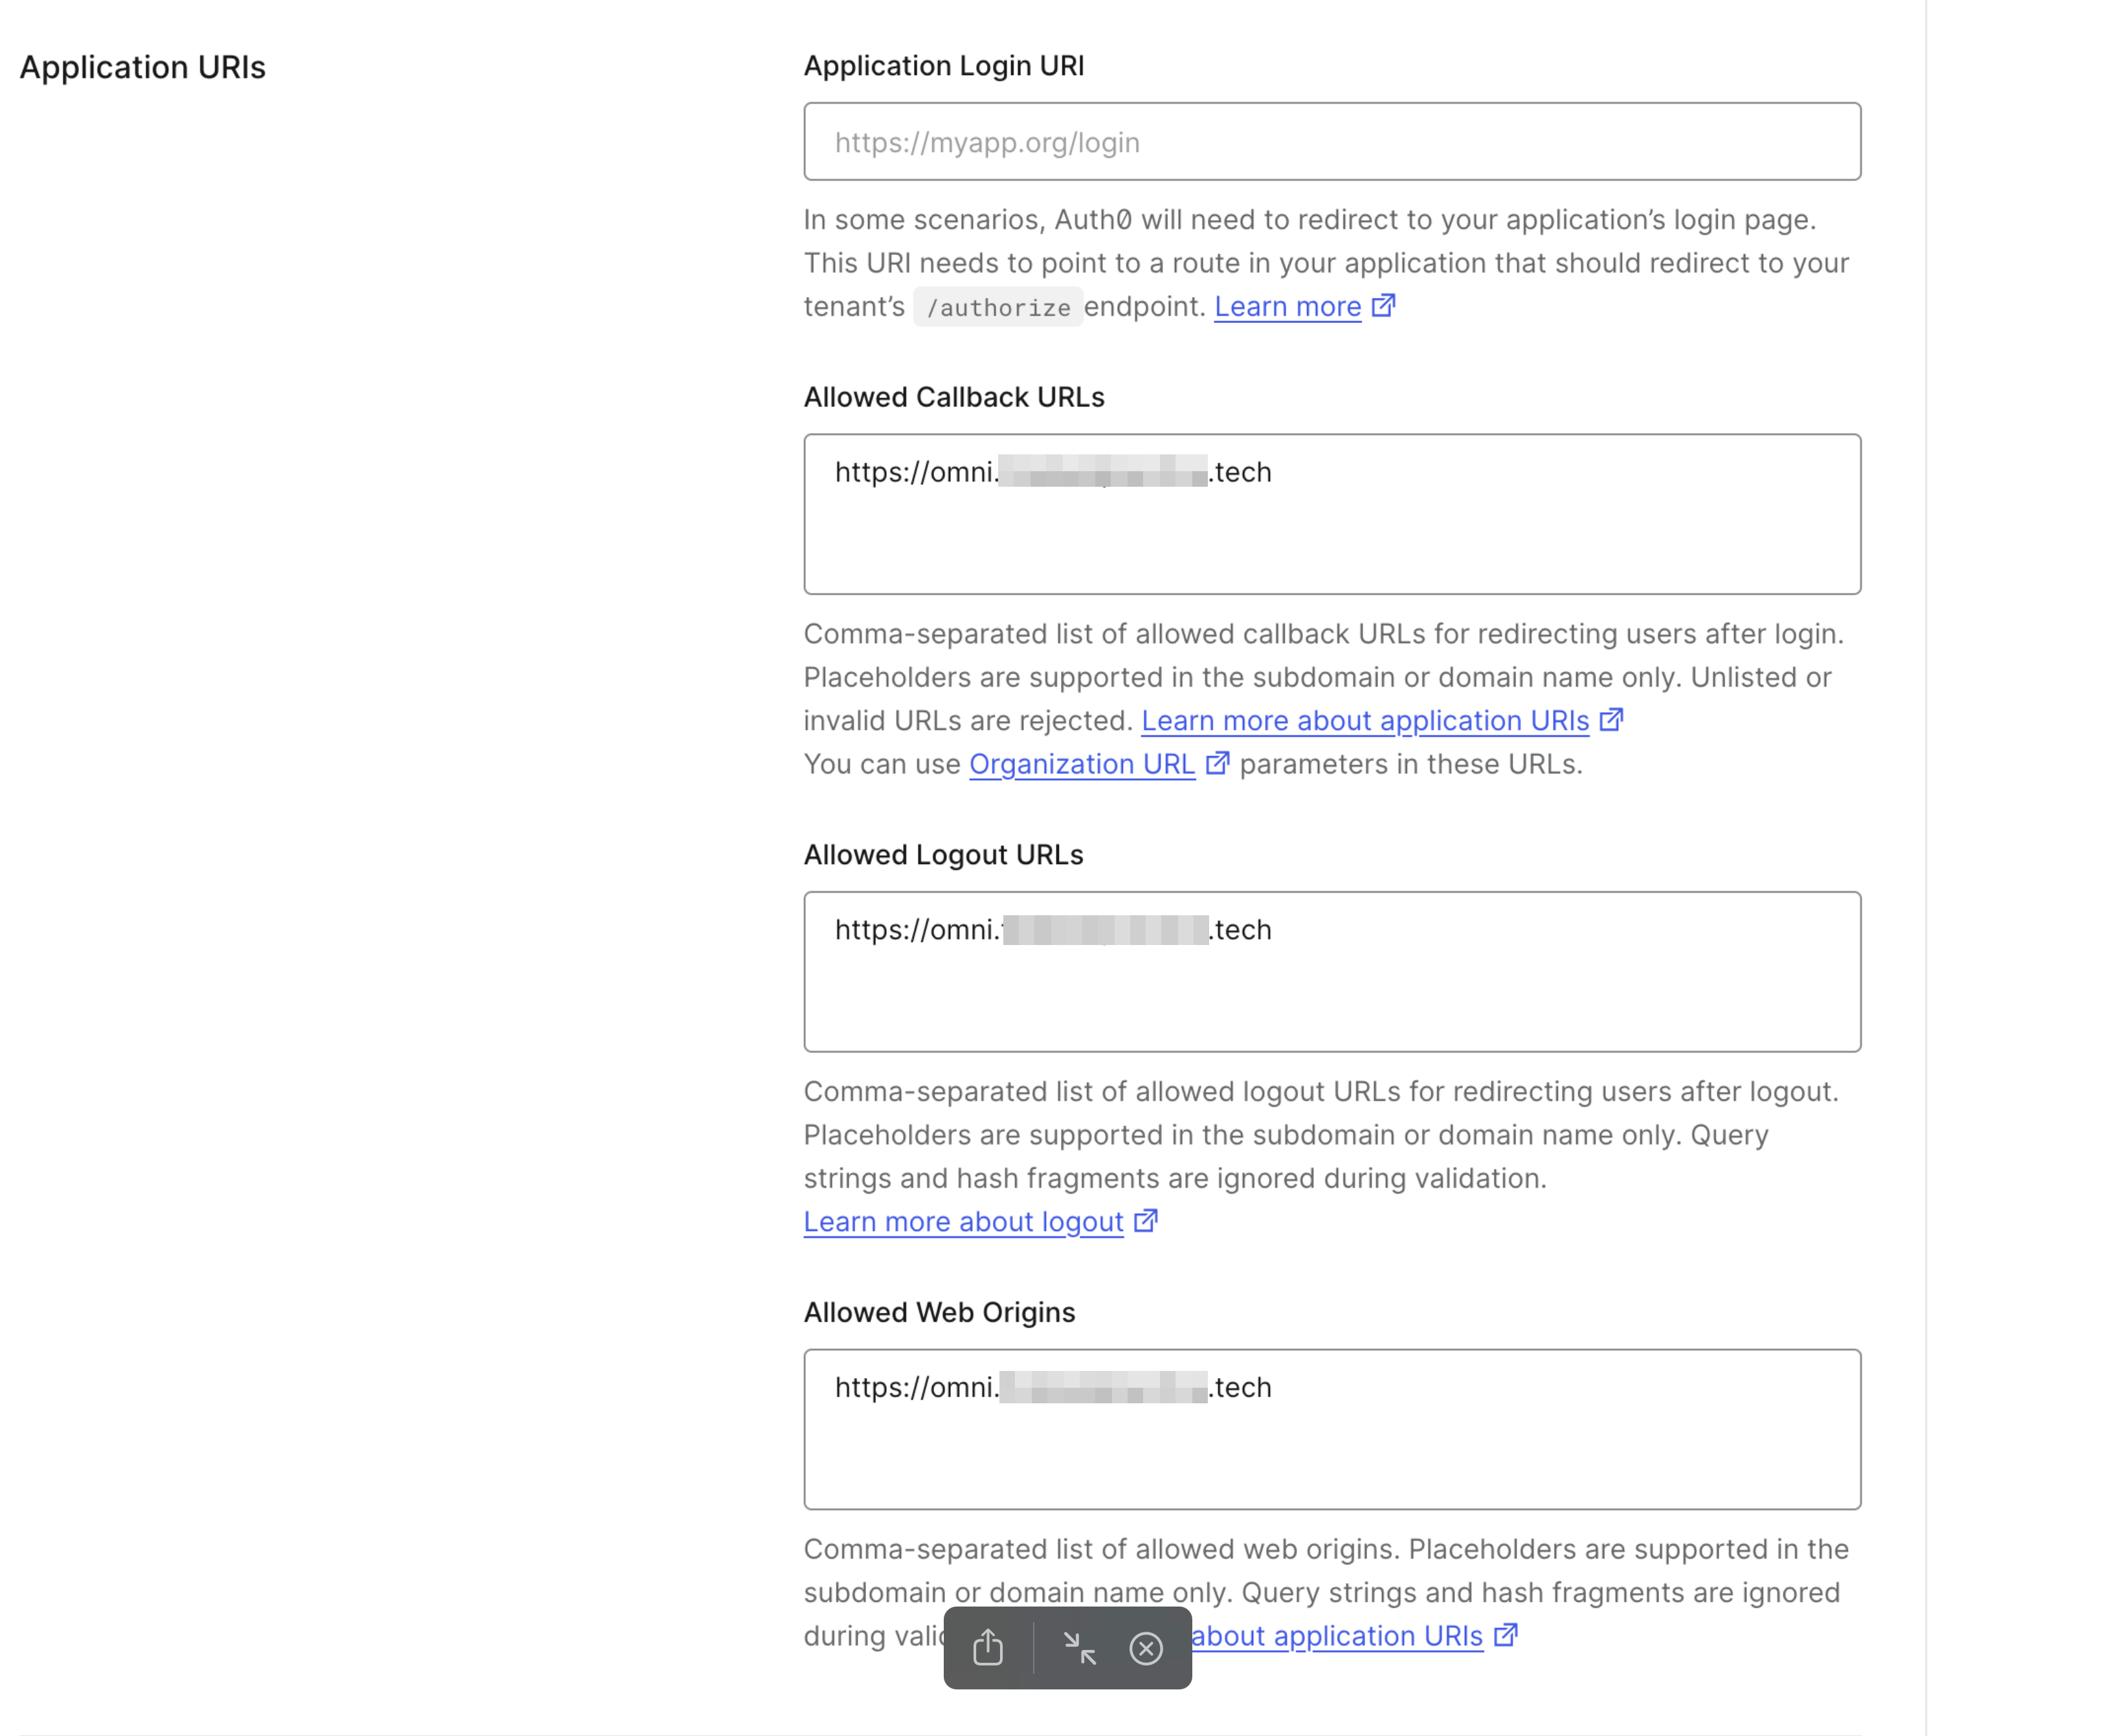
In the application’s settings, configure the following URLs, replacing
omni.yourdomain.comwith your domain:- Allowed Callback URLs:
https://omni.yourdomain.com - Allowed Logout URLs:
https://omni.yourdomain.com - Allowed Web Origins:
https://omni.yourdomain.com
- Allowed Callback URLs:
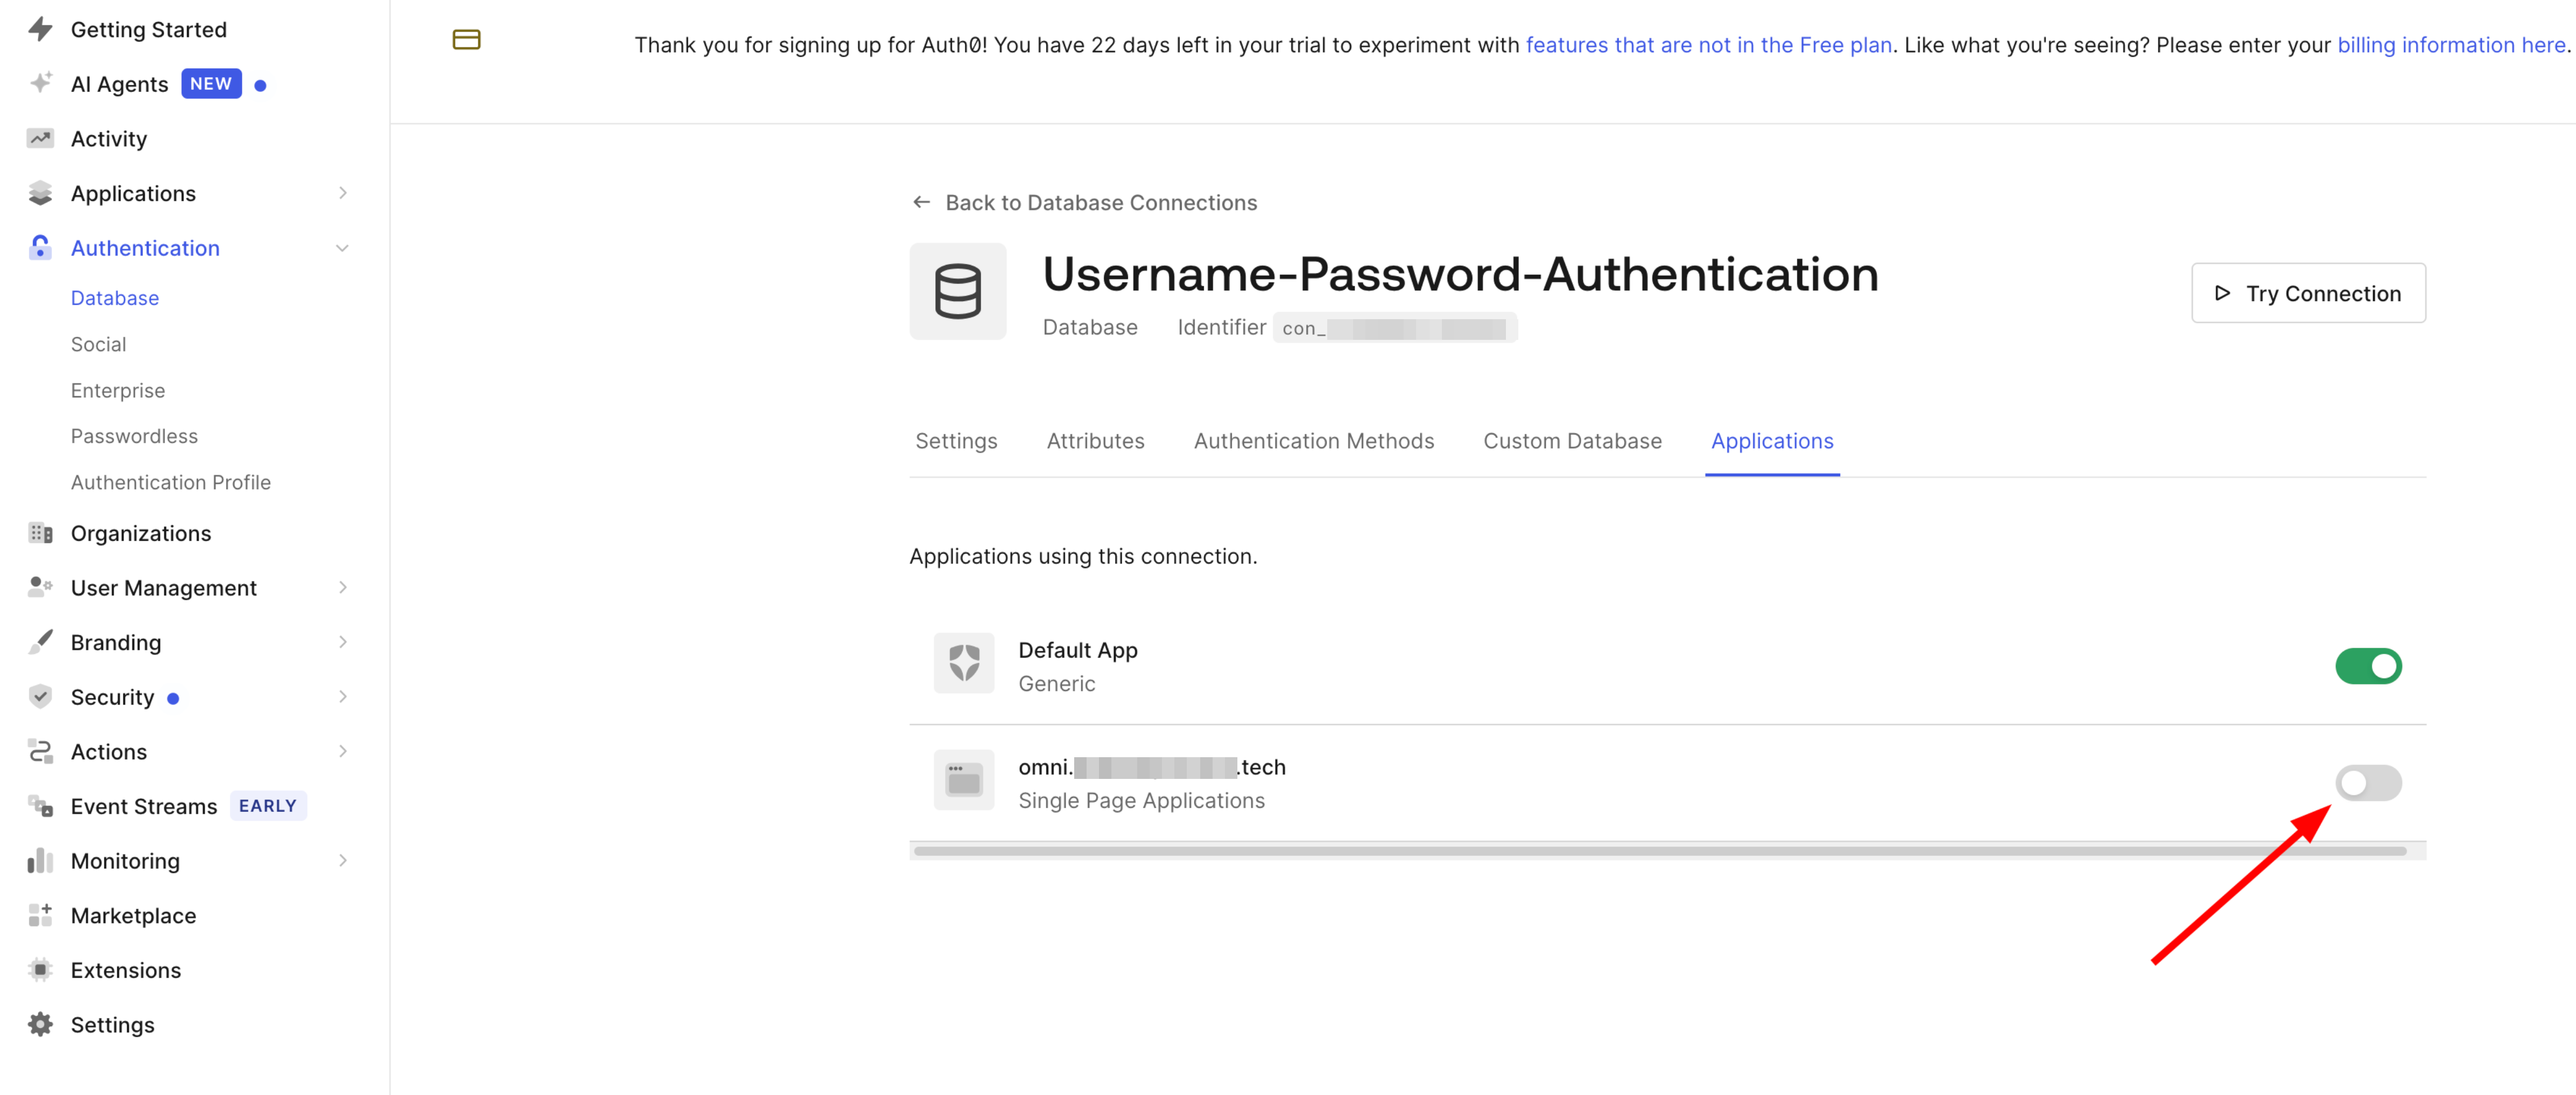
To enforce SSO, navigate to Authentication > Database and disable the local username/password database for this application.
Step 4: Bootstrap Omni with Docker Compose#
With our security components in place, we can now deploy Omni.
Download the configuration files from Sidero Labs:
export OMNI_VERSION=1.3.4 # Use the latest stable version
curl https://raw.githubusercontent.com/siderolabs/omni/v${OMNI_VERSION}/deploy/env.template > omni.env
curl https://raw.githubusercontent.com/siderolabs/omni/v${OMNI_VERSION}/deploy/compose.yaml -o compose.yaml
Edit the
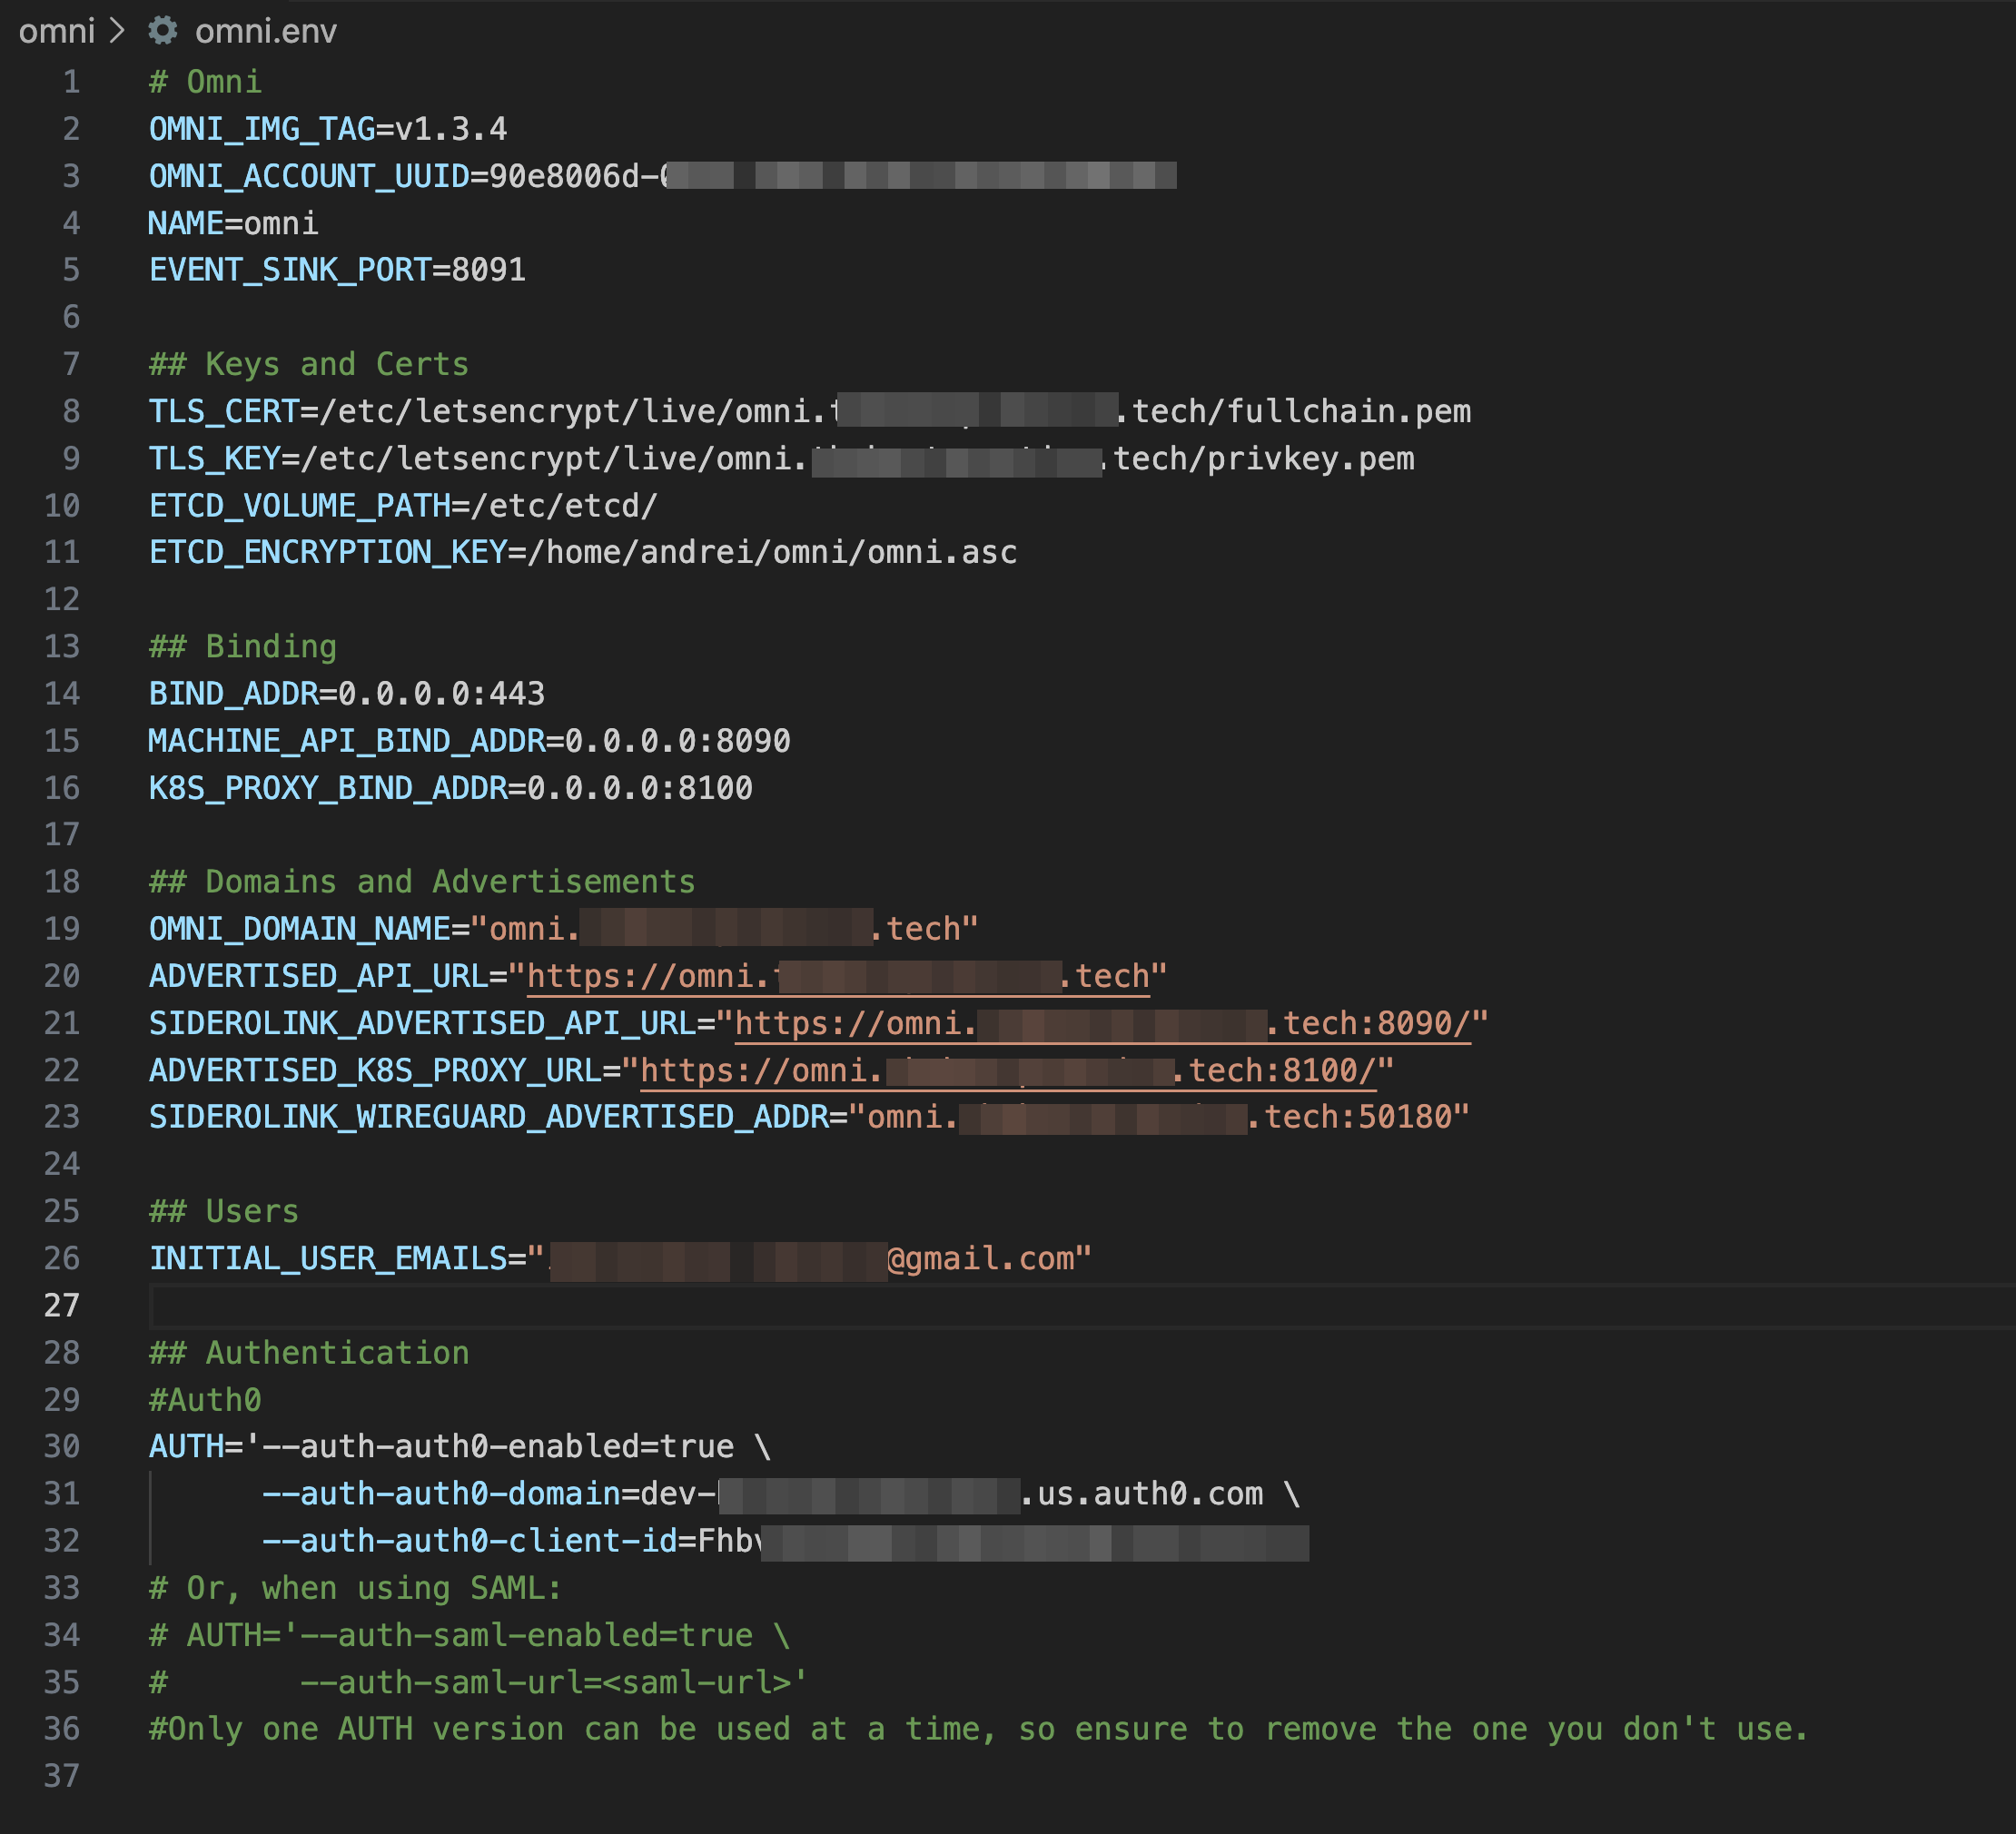
omni.envfile: This file contains all the configuration variables for Omni. Carefully fill in the required values, including:TLS_CERTandTLS_KEY: Paths to the certificates we generated.ETCD_ENCRYPTION_KEY: Path to theomni.ascGPG key.OMNI_DOMAIN_NAME: Your domain (omni.yourdomain.com).INITIAL_USER_EMAILS: Your email address, which will be granted initial admin access.- Auth0 details:
AUTH_AUTH0_DOMAINandAUTH_AUTH0_CLIENT_IDfrom your Auth0 application.
Launch Omni:
docker compose --env-file omni.env up -dDocker will pull the images and start the Omni containers in the background.
Step 5: First Login and Final Configuration#
To access the UI, you’ll need to resolve your Omni domain to the IP address of your Docker host.
Configure DNS: Create a DNS A record in your local DNS resolver (e.g., Pi-hole) pointing
omni.yourdomain.comto your Docker host’s IP address.Log In: Navigate to
https://omni.yourdomain.com. You should be redirected to the Auth0 login page. Log in with the social provider you configured (e.g., Google), and you’ll be redirected back to the Omni dashboard.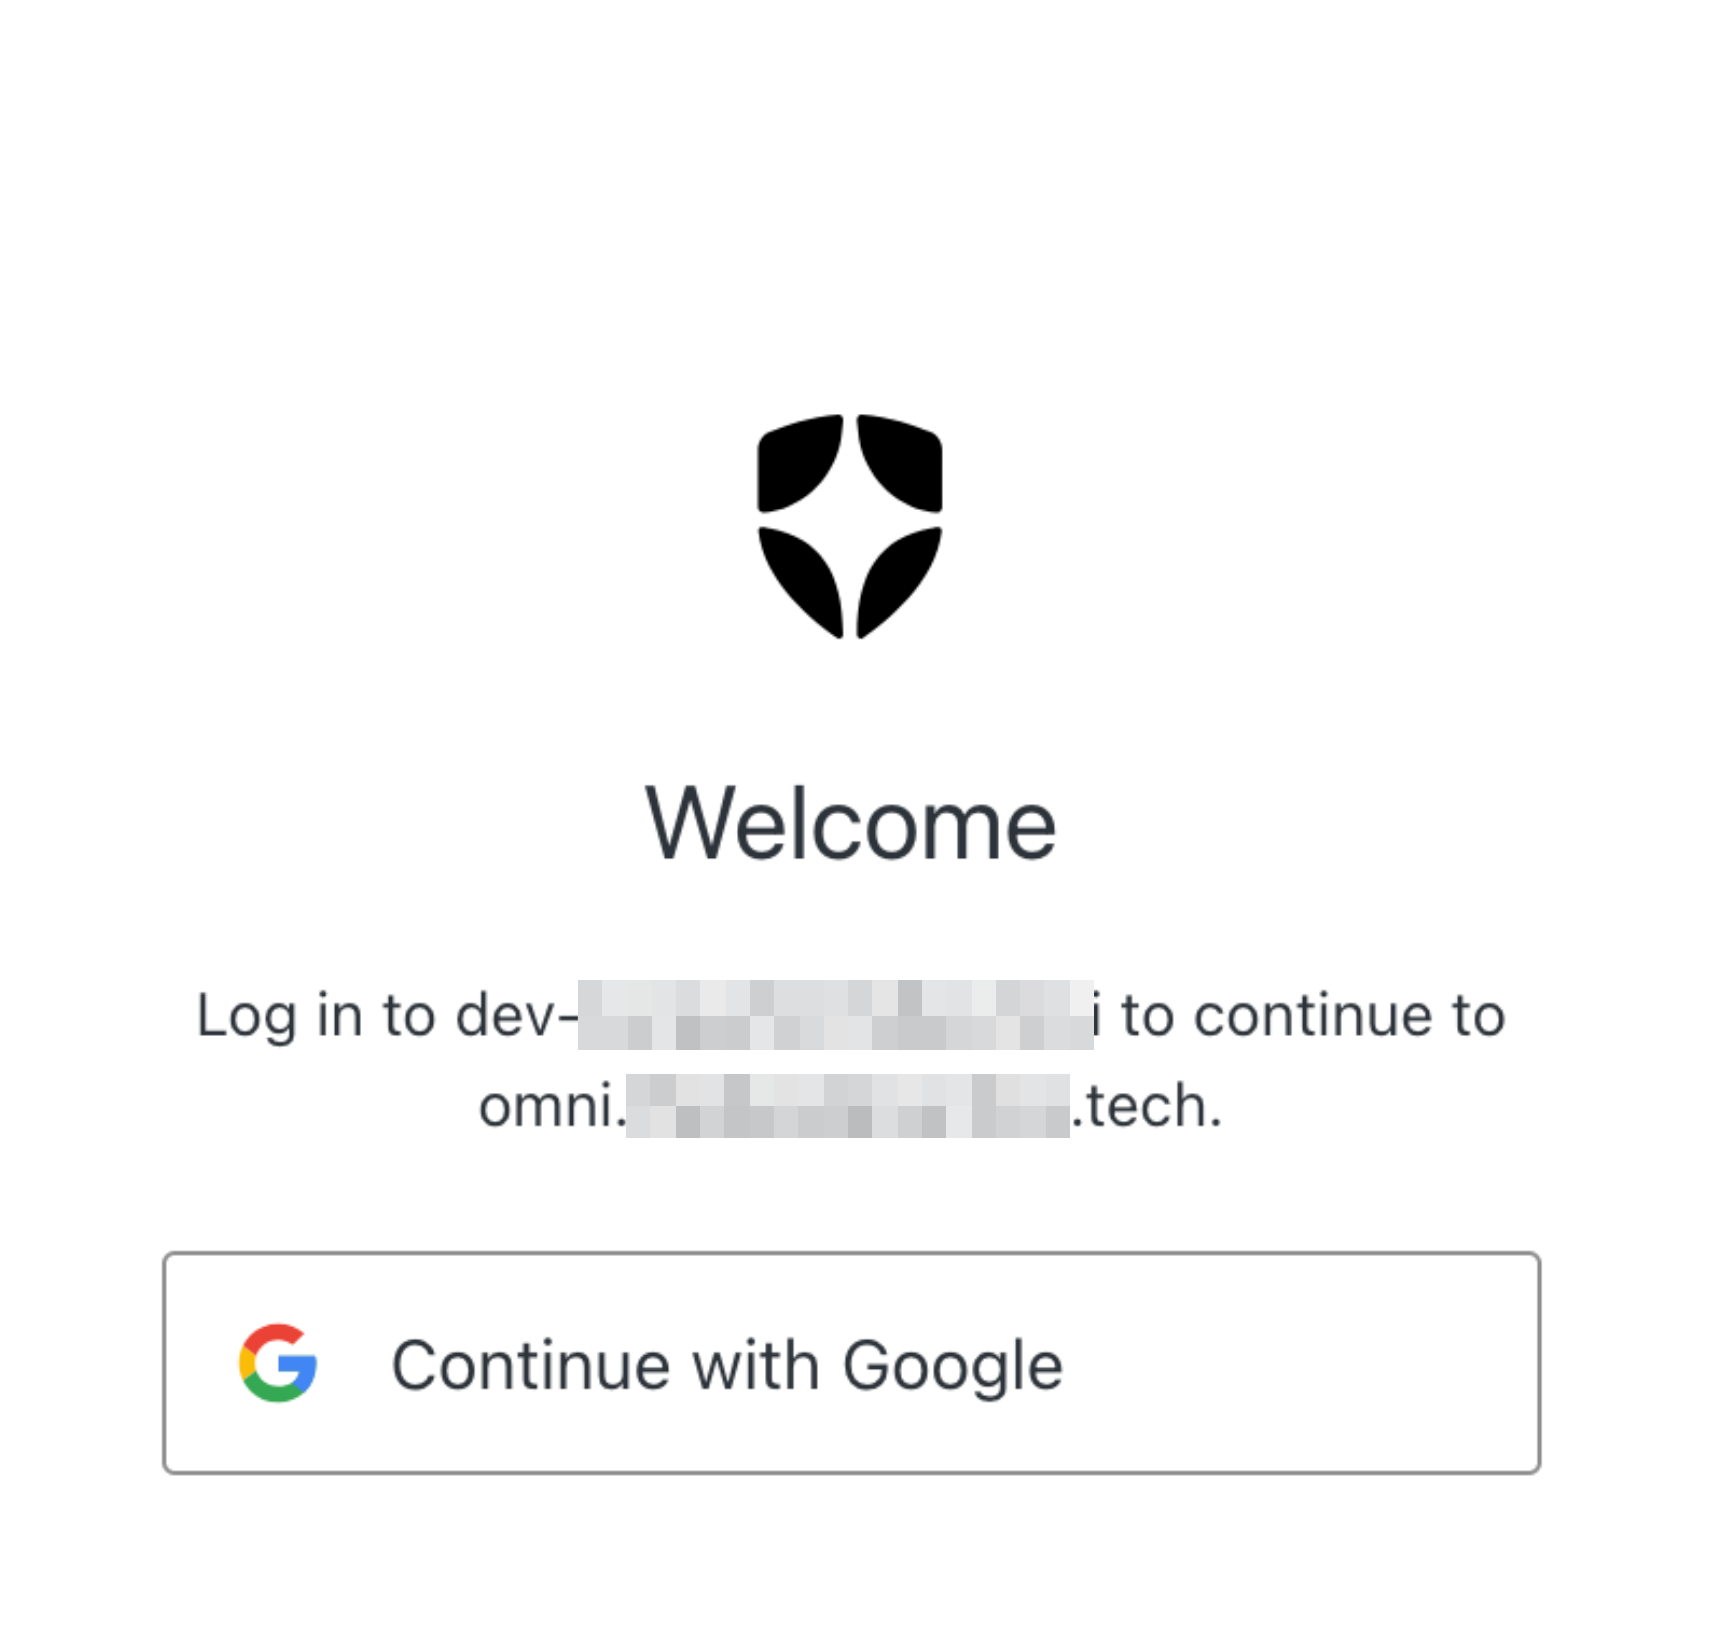

Conclusion#
By following these steps, you’ve deployed a powerful, self-hosted Kubernetes management plane in your homelab, mirroring the security and operational patterns of an enterprise environment. We’ve secured our endpoint with TLS, encrypted sensitive data at rest, and integrated a centralized identity provider… all before deploying a single workload.
Talos Omni provides an excellent foundation for managing a multi-cluster homelab. In future posts, I’ll explore how to provision a new Talos cluster and connect it to our Omni instance.
Stay tuned. Andrei