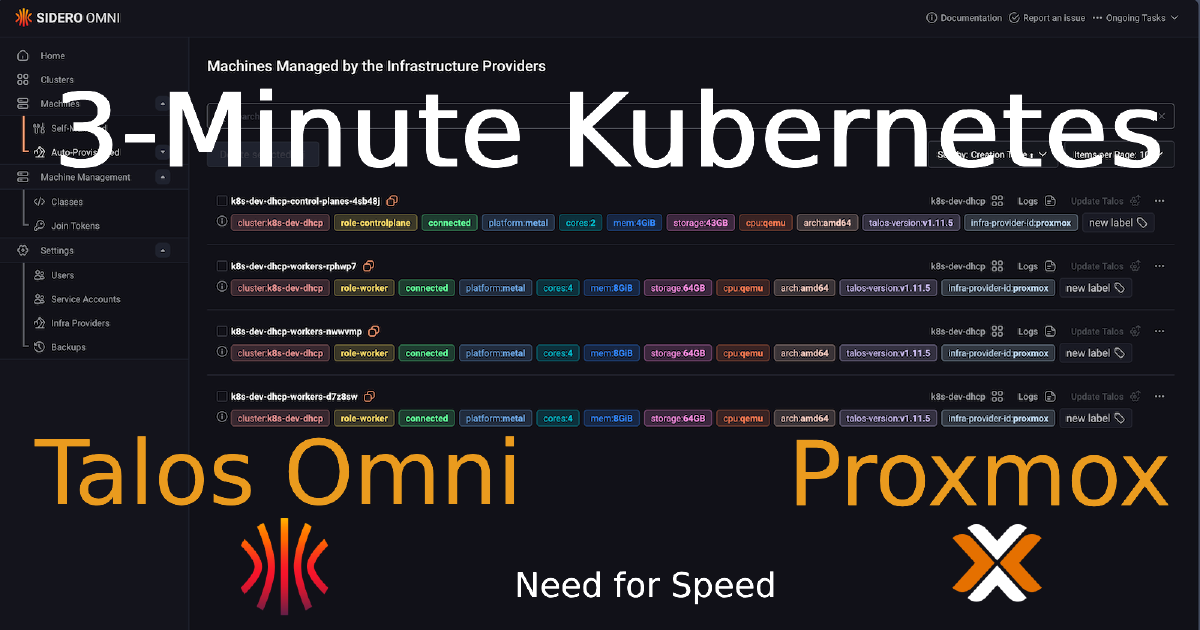

In my previous posts, I walked through installing Talos Omni and then manually provisioning a Talos Kubernetes cluster on Proxmox. Both were essential learning experiences. Getting Talos Omni running was a huge win, and understanding the manual provisioning process… from downloading the ISO, creating VMs, configuring static IPs in the console, and patching nodes… built a strong foundation. But the real game-changer wasn’t just running Kubernetes… it was discovering how quickly I could create it.
For years, spinning up a new K8s cluster was a significant undertaking. The traditional path using tools like Terraform, Ansible, and kubeadm is powerful but often slow and brittle. A single misconfiguration in an Ansible playbook or a change in the underlying OS could send you down a rabbit hole of debugging. As I showed in my manual provisioning guide, even with Talos, the process involved creating Proxmox VMs, booting from an ISO, and configuring each node one by one. It worked, but it lacked the velocity I was used to in the cloud.
This all changed when I discovered the Omni Proxmox Provider. Combined with a GitOps approach using omnictl, I can now define entire Kubernetes clusters as code, version control them, and deploy them with a single command. This is the story of how I went from carefully tending to my Kubernetes cluster to treating it like disposable cattle… and why that’s a massive upgrade for any developer.
Note: All the configuration files, machine class definitions, and cluster templates referenced in this post are available in my GitHub repository. Feel free to use them as a starting point for your own setup.
The Game-Changer: The Omni Proxmox Provider#
The Omni Proxmox Provider is a direct integration between Talos Omni and the Proxmox API. Instead of you manually creating virtual machines, Omni does it for you. You define a cluster configuration as YAML… how many nodes, how much RAM, which Proxmox node to build on—and with a single omnictl command, Omni makes the API calls to Proxmox to provision the VMs, attach the Talos ISO, and boot them up.
The entire process is automated. What used to be a 30 minute, multi-step manual task is now a 3 minute, single-command operation.
| Method | Time to Provision | Process | Fragility |
|---|---|---|---|
| Terraform + Ansible + Kubeadm | 1-2 Hours | Complex, multi-stage process involving IaC for VMs and configuration management for K8s components. | High. Prone to breaking with OS or tool updates. |
| Manual Proxmox + Talos ISO | 20-30 Minutes | Create VM templates, clone them, manually configure IPs and hostnames in the console. | Medium. Repetitive manual steps are error-prone. |
| Omni Proxmox Provider + omnictl | ~3 Minutes | Define cluster as YAML, run omnictl cluster template sync. Omni handles everything. | Low. A purpose-built, integrated, and repeatable GitOps process. |
Why I No Longer Fear Breaking My Cluster#
This speed has fundamentally changed my developer experience. My Proxmox-based Kubernetes cluster is now my primary development environment. Because I can tear it down and bring it back up in the time it takes to grab a coffee, I’m no longer afraid to break things.
- Experiment Fearlessly: Testing a new CNI, a service mesh, or a chaotic operator that might destabilize the cluster? Go for it. If it all goes wrong, I don’t spend hours trying to fix it. I just delete the cluster and provision a new one.
- Clean State, Every Time: I can start my day with a completely fresh cluster, ensuring no leftover artifacts from previous experiments interfere with my work.
- Parallel Environments: Need to test how two different versions of an application interact? I can spin up two separate, isolated clusters in minutes.
This is the “cattle, not pets” philosophy in action. My cluster is no longer a precious thing to be carefully maintained. It’s a disposable, reproducible resource, just like a container.
Prerequisites#
Before we begin, ensure you have:
- A working Talos Omni installation (see my previous guide).
- A Proxmox VE server with administrative access.
- A system with Homebrew installed for
omnictlCLI.
Step 1: Create a Proxmox API Token#
First, we need to give Omni the credentials to manage Proxmox on our behalf.
- In your Proxmox web interface, navigate to Datacenter → Permissions → API Tokens.
- Create a new API token:
- User:
root@pam - Token ID:
omni-proxmox-provider
- User:
- Critical: Save the generated token secret immediately. You won’t be able to retrieve it again.
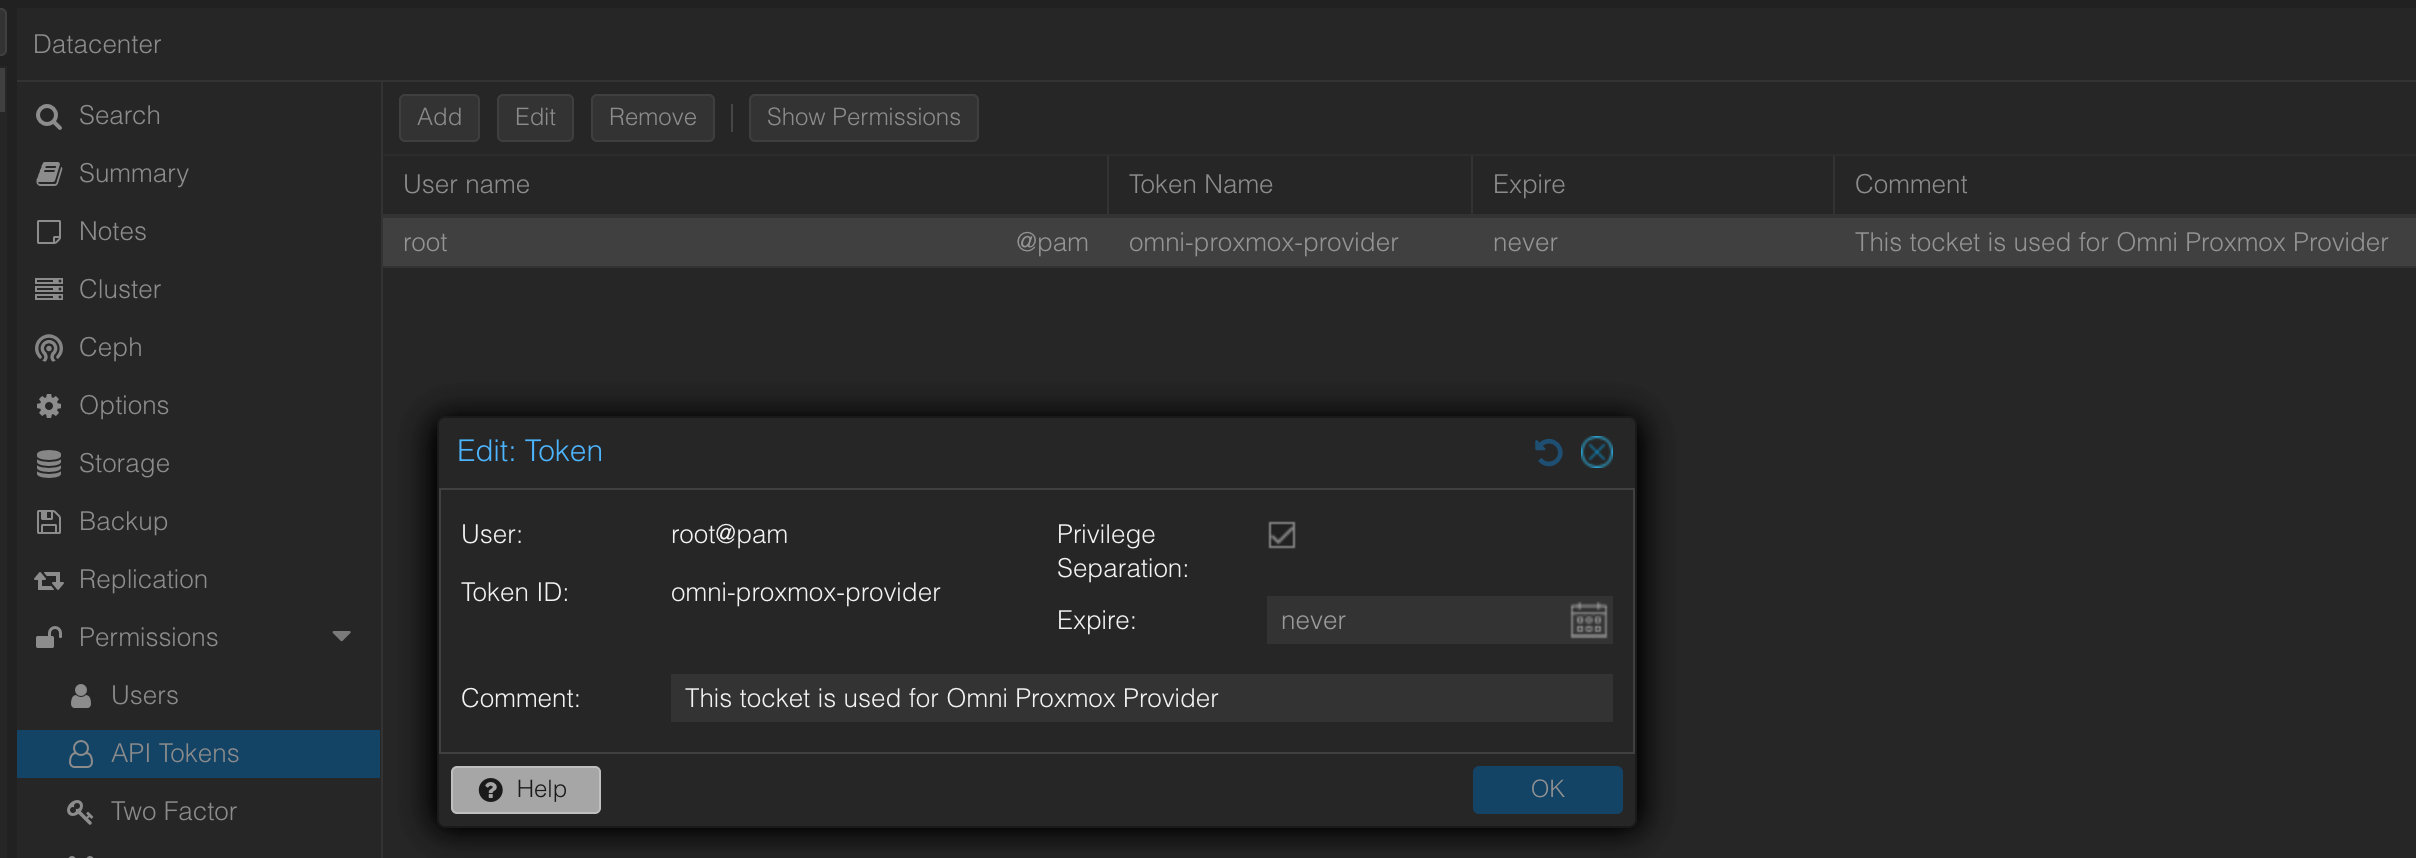
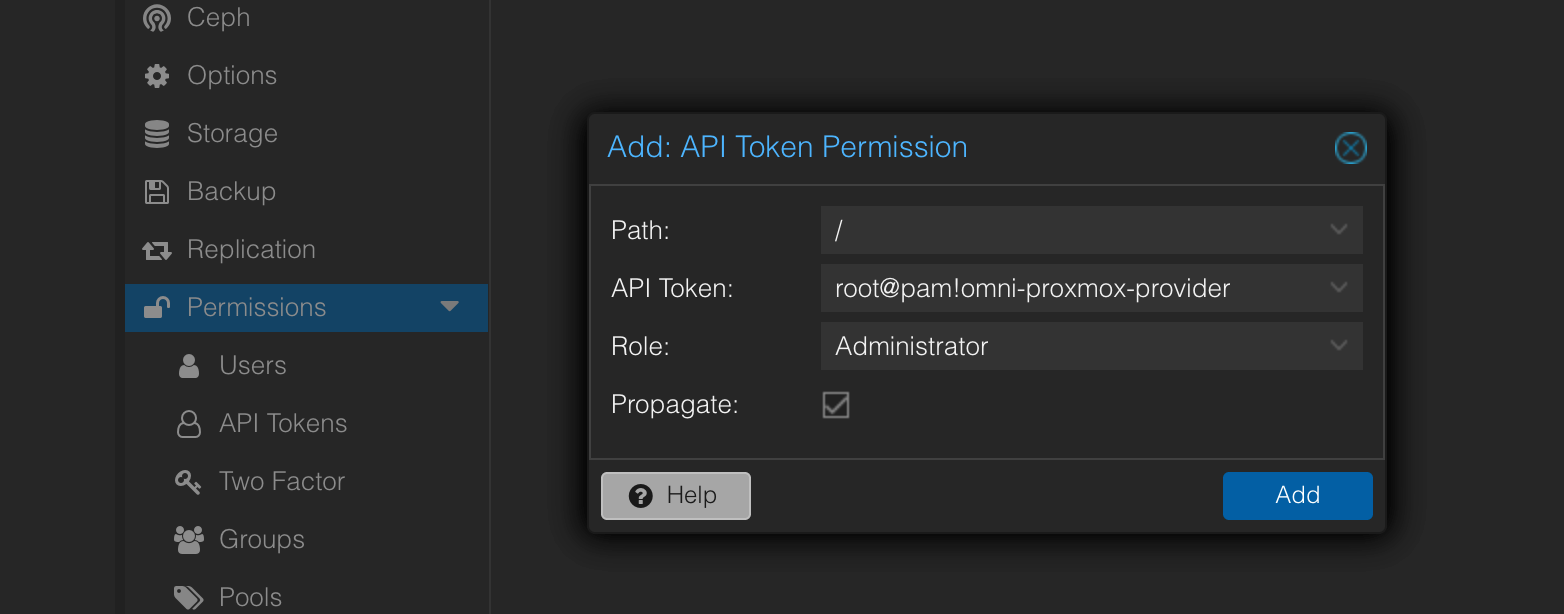
- Grant permissions to the token:
- Go to Datacenter → Permissions → Add.
- Select your new token and assign it the Administrator role (for testing; you can scope this down for production).
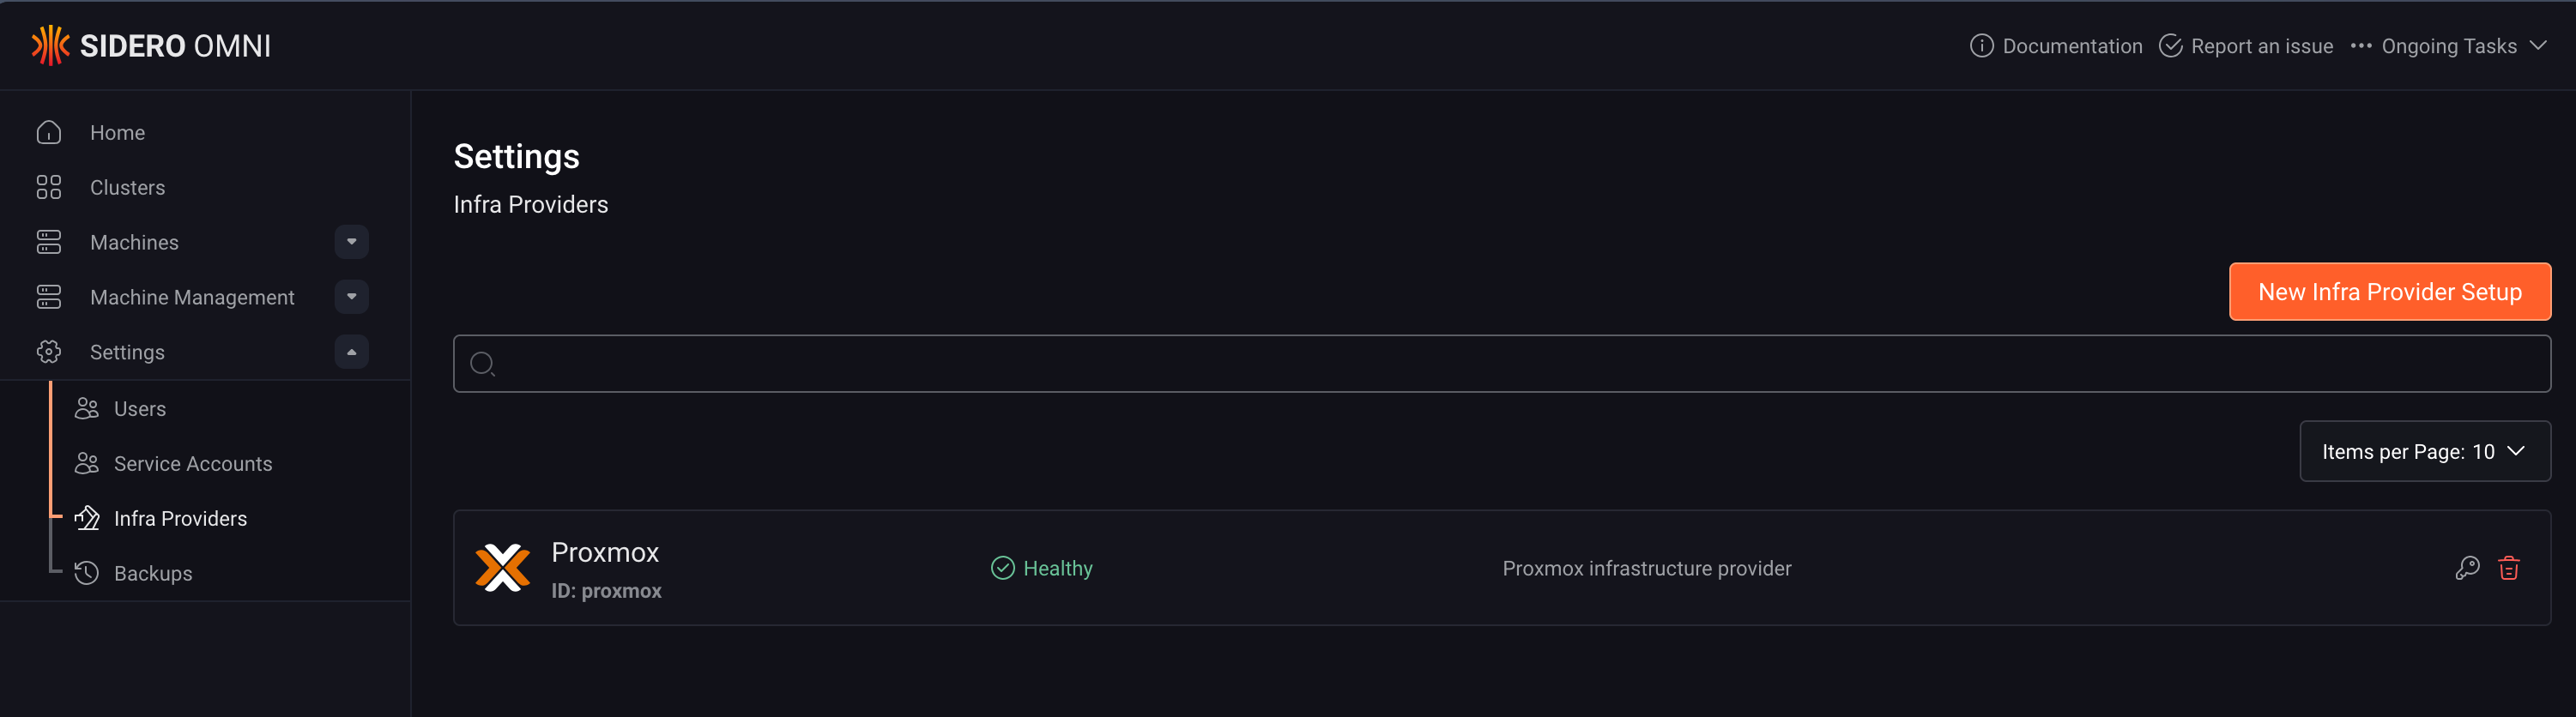
Step 2: Configure the Omni Infrastructure Provider#
Now we’ll register Proxmox as an infrastructure provider in Omni. This is one of the few tasks we’ll do in the UI… just to generate the service account key.
- Log in to your Omni UI and navigate to Settings → Infrastructure Providers.
- Click Create Provider and name it
proxmox. - Copy the Service Account Key that Omni generates and store this securely.

This key will authenticate the Proxmox provider container back to Omni. After this step, everything else is done via omnictl.
Step 3: Deploy the Proxmox Provider with Docker#
The Proxmox provider runs as a separate container that bridges Omni and your Proxmox API.
Create a configuration file (
config.yaml) with your Proxmox connection details:proxmox: url: "https://homelab.proxmox:8006/api2/json" insecureSkipVerify: true tokenID: "root@pam!omni-proxmox-provider" tokenSecret: "YOUR-PROXMOX-TOKEN-SECRET"Replace
YOUR-PROXMOX-TOKEN-SECRETwith the token you saved in Step 1.Create a
.envfile with the Omni connection details:OMNI_API_ENDPOINT=https://omni.yourdomain.com OMNI_INFRA_PROVIDER_KEY=YOUR-SERVICE-ACCOUNT-KEYReplace
YOUR-SERVICE-ACCOUNT-KEYwith the key you copied in Step 2.Create a
docker-compose.ymlfile:services: omni-infra-provider-proxmox: image: ghcr.io/siderolabs/omni-infra-provider-proxmox container_name: omni-infra-provider-proxmox env_file: - .env volumes: - ./config.yaml:/config.yaml command: > --config-file /config.yaml --omni-api-endpoint ${OMNI_API_ENDPOINT} --omni-service-account-key ${OMNI_INFRA_PROVIDER_KEY} restart: unless-stopped network_mode: hostStart the provider:
docker compose up -dYou should now see both containers running: the Omni UI and the Proxmox provider.

- Verify the connection: Back in the Omni UI, go to Settings → Infrastructure Providers. Your
proxmoxprovider should now show a status of Healthy.
Step 4: Install and Configure omnictl#
This is where the GitOps approach begins. Instead of clicking through a UI, we’ll define everything as code and manage it through omnictl.
Install
omnictlusing Homebrew:brew install siderolabs/tap/sidero-toolsThis also installs
talosctland thekubectl oidc-loginplugin.Create the configuration directory:
omnictl config contextsThis command will initially fail but creates the required directory:
~/.talos/omni/.Download your Omni configuration:
- In the Omni UI, go to Home → Download omniconfig.
- Move the file to the correct location:
mv omniconfig.yaml ~/.talos/omni/config
Verify the configuration:
omnictl config contextsYou should see your Omni instance listed.
Authenticate:
omnictl get clustersThis will open your browser for Auth0 authentication. Once complete, you’re ready to go.
Important Note: The omnictl version must match your Omni backend’s API version. If you see a version mismatch error, update your Omni instance or downgrade omnictl to match.
Step 5: Define Machine Classes#
Machine classes are templates that define the VM specifications for your cluster nodes.
Create a control plane machine class (
control-plane.yaml):metadata: namespace: default type: MachineClasses.omni.sidero.dev id: proxmox-control-plane spec: matchlabels: [] autoprovision: providerid: proxmox providerdata: | cores: 2 sockets: 1 memory: 4096 disk_size: 40 network_bridge: vmbr0 storage_selector: name == "local-lvm"Create a worker machine class (
worker.yaml):metadata: namespace: default type: MachineClasses.omni.sidero.dev id: proxmox-worker spec: matchlabels: [] autoprovision: providerid: proxmox providerdata: | cores: 4 sockets: 1 memory: 8192 disk_size: 60 network_bridge: vmbr0 storage_selector: name == "local-lvm"Apply the machine classes:
omnictl apply -f control-plane.yaml
omnictl apply -f worker.yaml
These machine classes are now available for use in any cluster definition.
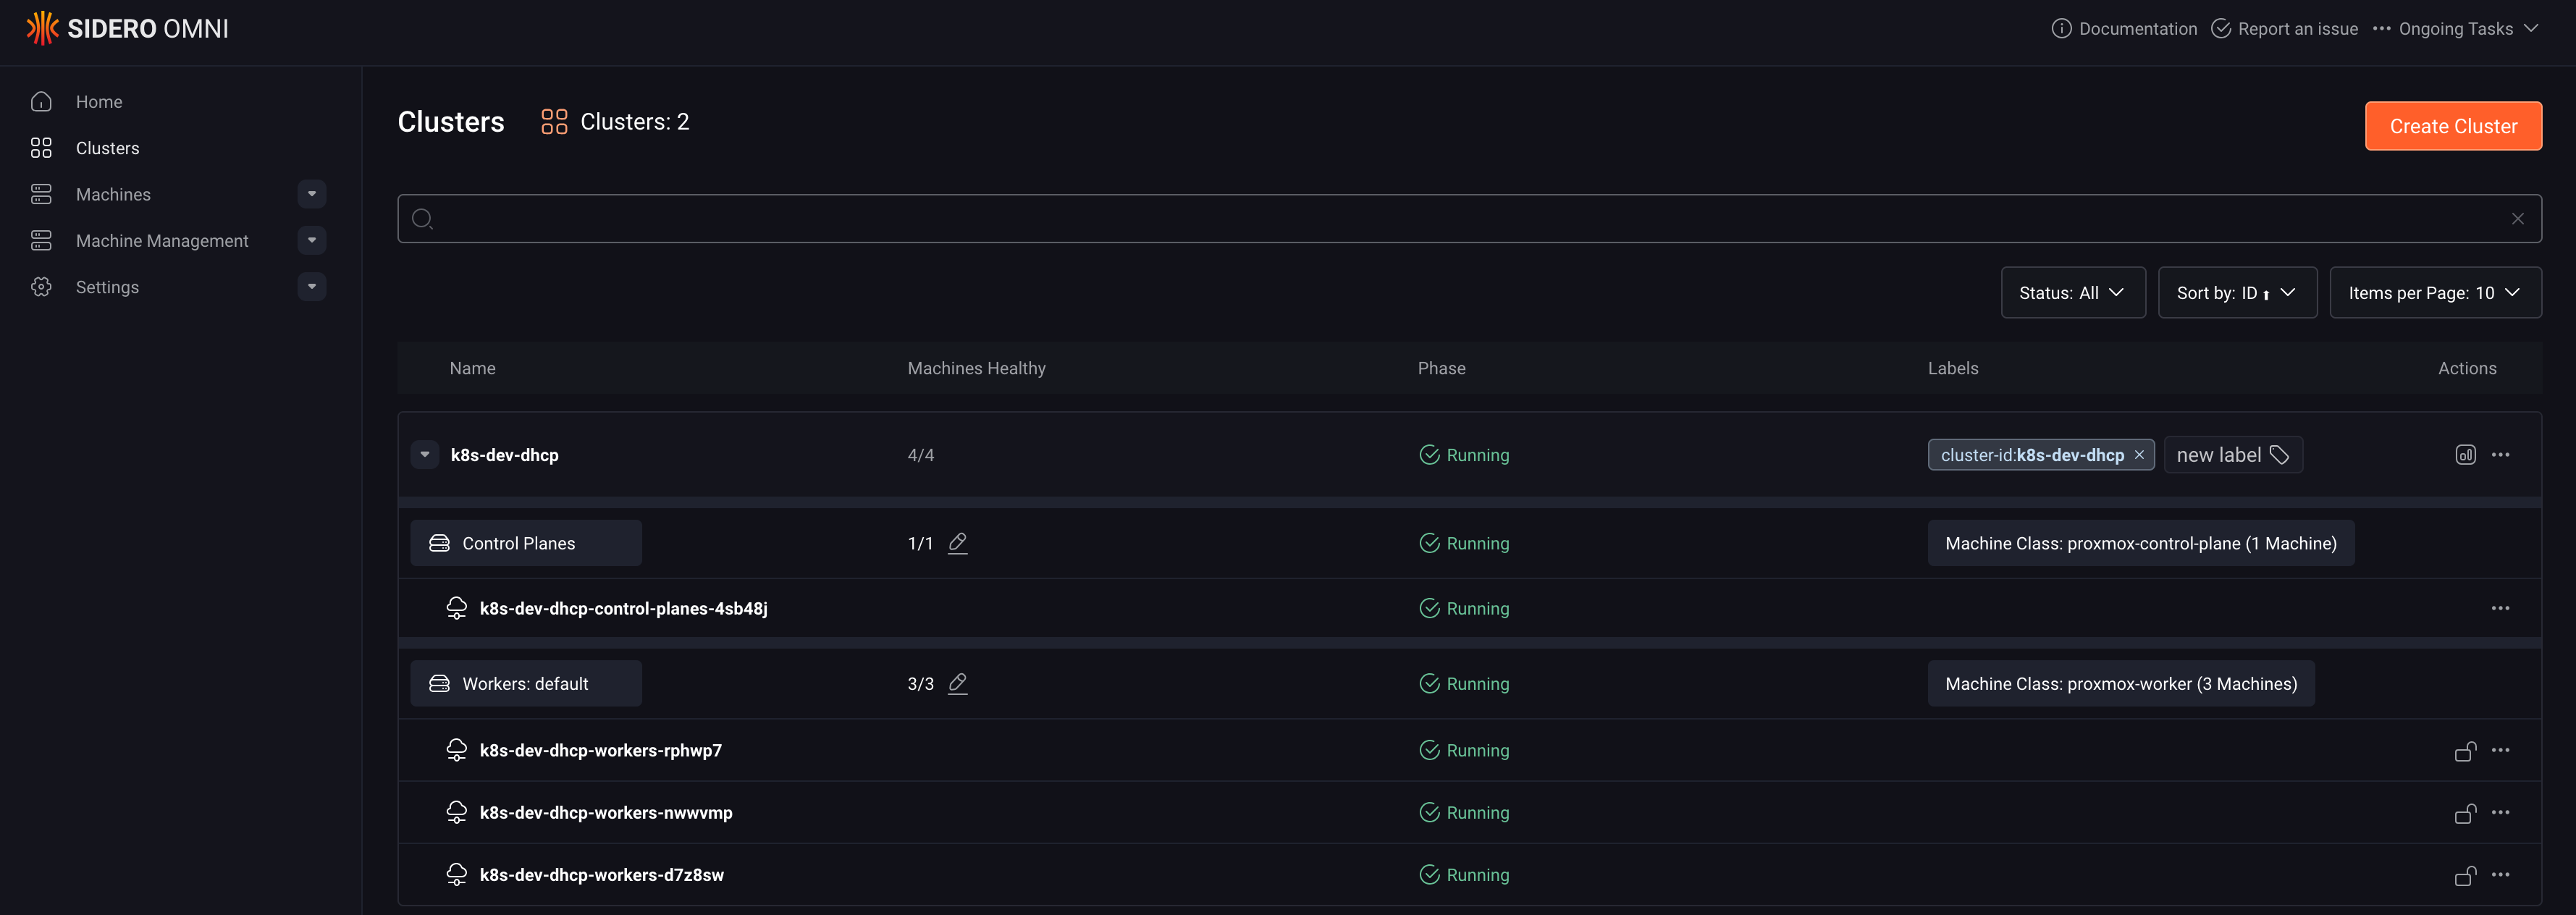
Step 6: Create Your First Automated Cluster#
Now for the moment of truth: provisioning a cluster with a single command.
Create a cluster definition (
k8s-dev-dhcp.yaml):kind: Cluster name: k8s-dev-dhcp kubernetes: version: v1.34.2 talos: version: v1.11.5 --- kind: ControlPlane machineClass: name: proxmox-control-plane size: 1 systemExtensions: - siderolabs/iscsi-tools - siderolabs/nfsd - siderolabs/qemu-guest-agent - siderolabs/util-linux-tools patches: - name: hostname-cp inline: machine: network: hostname: k8s-dev-cp time: servers: - pool.ntp.org --- kind: Workers name: workers machineClass: name: proxmox-worker size: 3 systemExtensions: - siderolabs/iscsi-tools - siderolabs/nfsd - siderolabs/qemu-guest-agent - siderolabs/util-linux-tools patches: - name: worker-labels inline: machine: nodeLabels: node-role.kubernetes.io/worker: "" - name: hostname-prefix inline: machine: network: hostname: k8s-dev-worker time: servers: - pool.ntp.orgDeploy the cluster:
omnictl cluster template sync -f k8s-dev-dhcp.yamlWatch the magic happen:
- Monitor progress with:
omnictl get machines --watch - Or check the Omni UI to see the cluster provisioning status.
- Monitor progress with:

- In Proxmox, watch as VMs are automatically created, configured, and powered on.
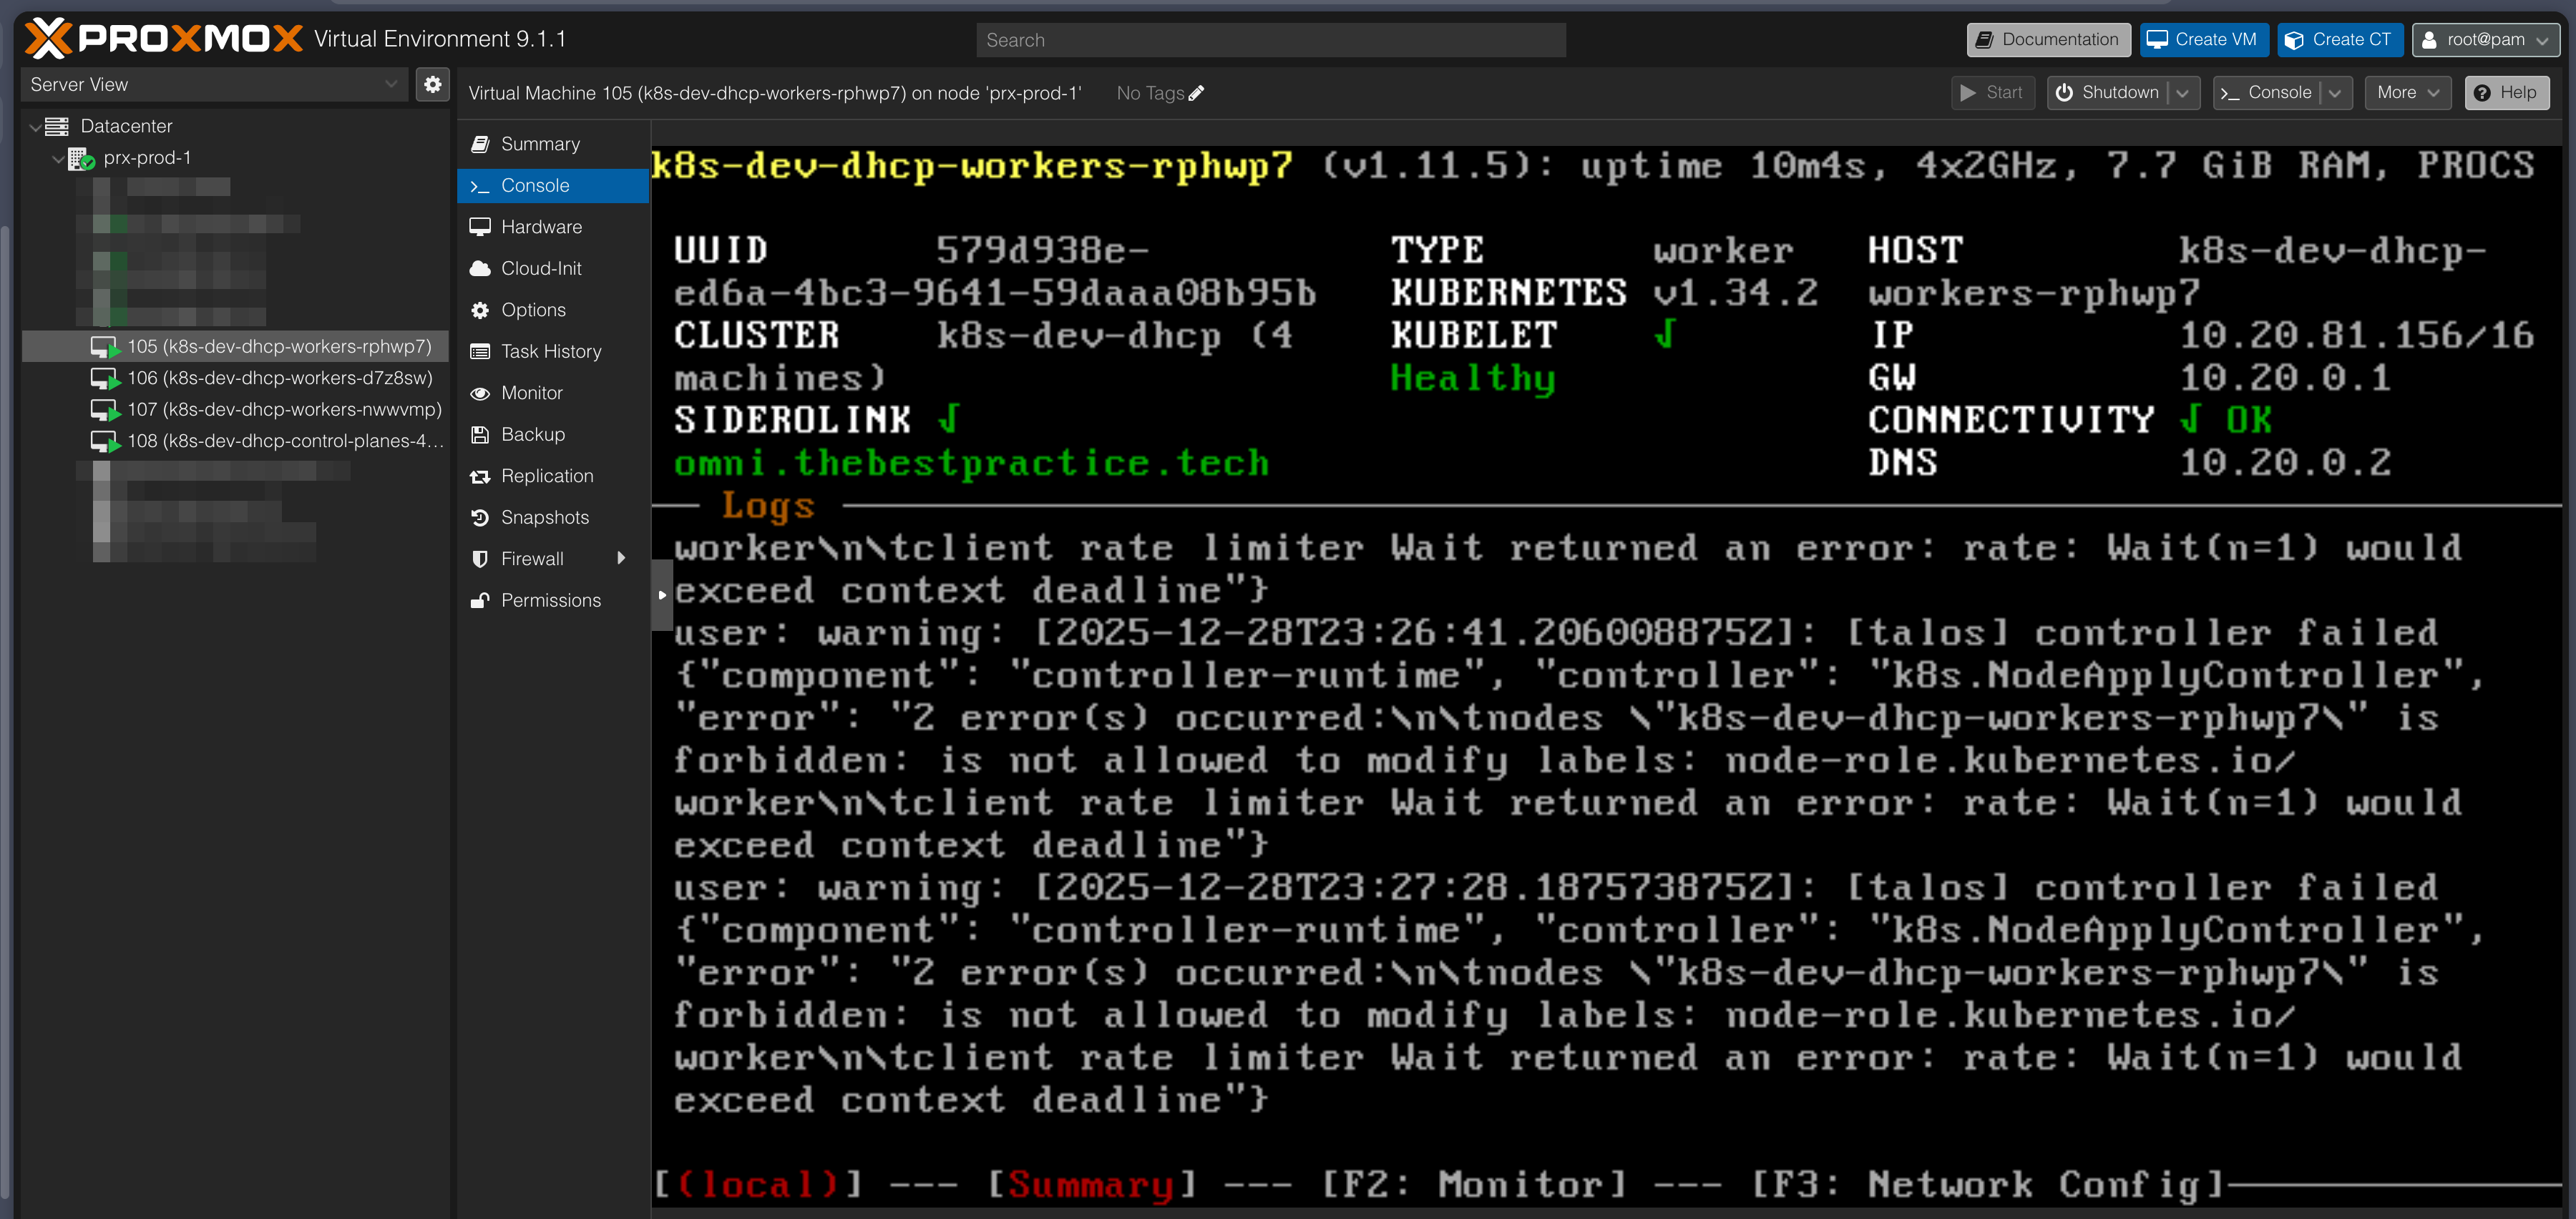
- Within 3-5 minutes, your cluster will be fully operational.
- Connect to your new cluster:
- Download the kubeconfig:
omnictl kubeconfig -c k8s-dev-dhcp > ~/.kube/k8s-dev-dhcp.yaml - Or download it from the Omni UI if you prefer.
- Run
kubectl get nodesto verify your cluster is up and running.
- Download the kubeconfig:
You’ve just provisioned a production-grade Kubernetes cluster on Proxmox without touching a single VM console.
Conclusion: GitOps Meets Homelab Velocity#
Installing Talos Omni was about bringing enterprise patterns home. But integrating it with the Proxmox provider and adopting a GitOps workflow was about unlocking enterprise velocity. The ability to provision Kubernetes clusters on-demand, with zero friction, using version-controlled configuration files is the real superpower. It transforms your homelab from a static environment into a dynamic, flexible platform for learning and innovation.
By treating your infrastructure as code, you get:
- Reproducibility: Every cluster is built from the same, tested configuration.
- Version Control: Track changes to your infrastructure over time with Git.
- Disaster Recovery: Recreate your entire environment from a Git clone.
- Experimentation: Test changes in dev before applying them to production.
If you’re running Proxmox and Talos, the Omni Proxmox Provider combined with omnictl isn’t just a nice-to-have; it’s a must-have. It will completely change the way you interact with Kubernetes.
Want to get started? Clone my GitHub repository and adapt the configuration files for your own environment. Everything you need is there: provider setup, machine classes, and ready-to-deploy cluster templates for both development and production.
Stay tuned. Andrei